PLEASE READ ALL INSTRUCTIONS PRIOR TO INSTALLATION
There are so many different longarm models available on the market and so far we haven’t met one that A Quilter’s Eye cannot be attached to. The instructions below are for some of the more common machines.
Select tab below to view instructions
New Edition of a Quilter’s Eye
Previous Version of a Quilter’s Eye
Optional Brackets for Installation
New Edition of a Quilter’s Eye
INSTALLATION INSTRUCTIONS FOR NEW EDITION OF A QUILTER’S EYE
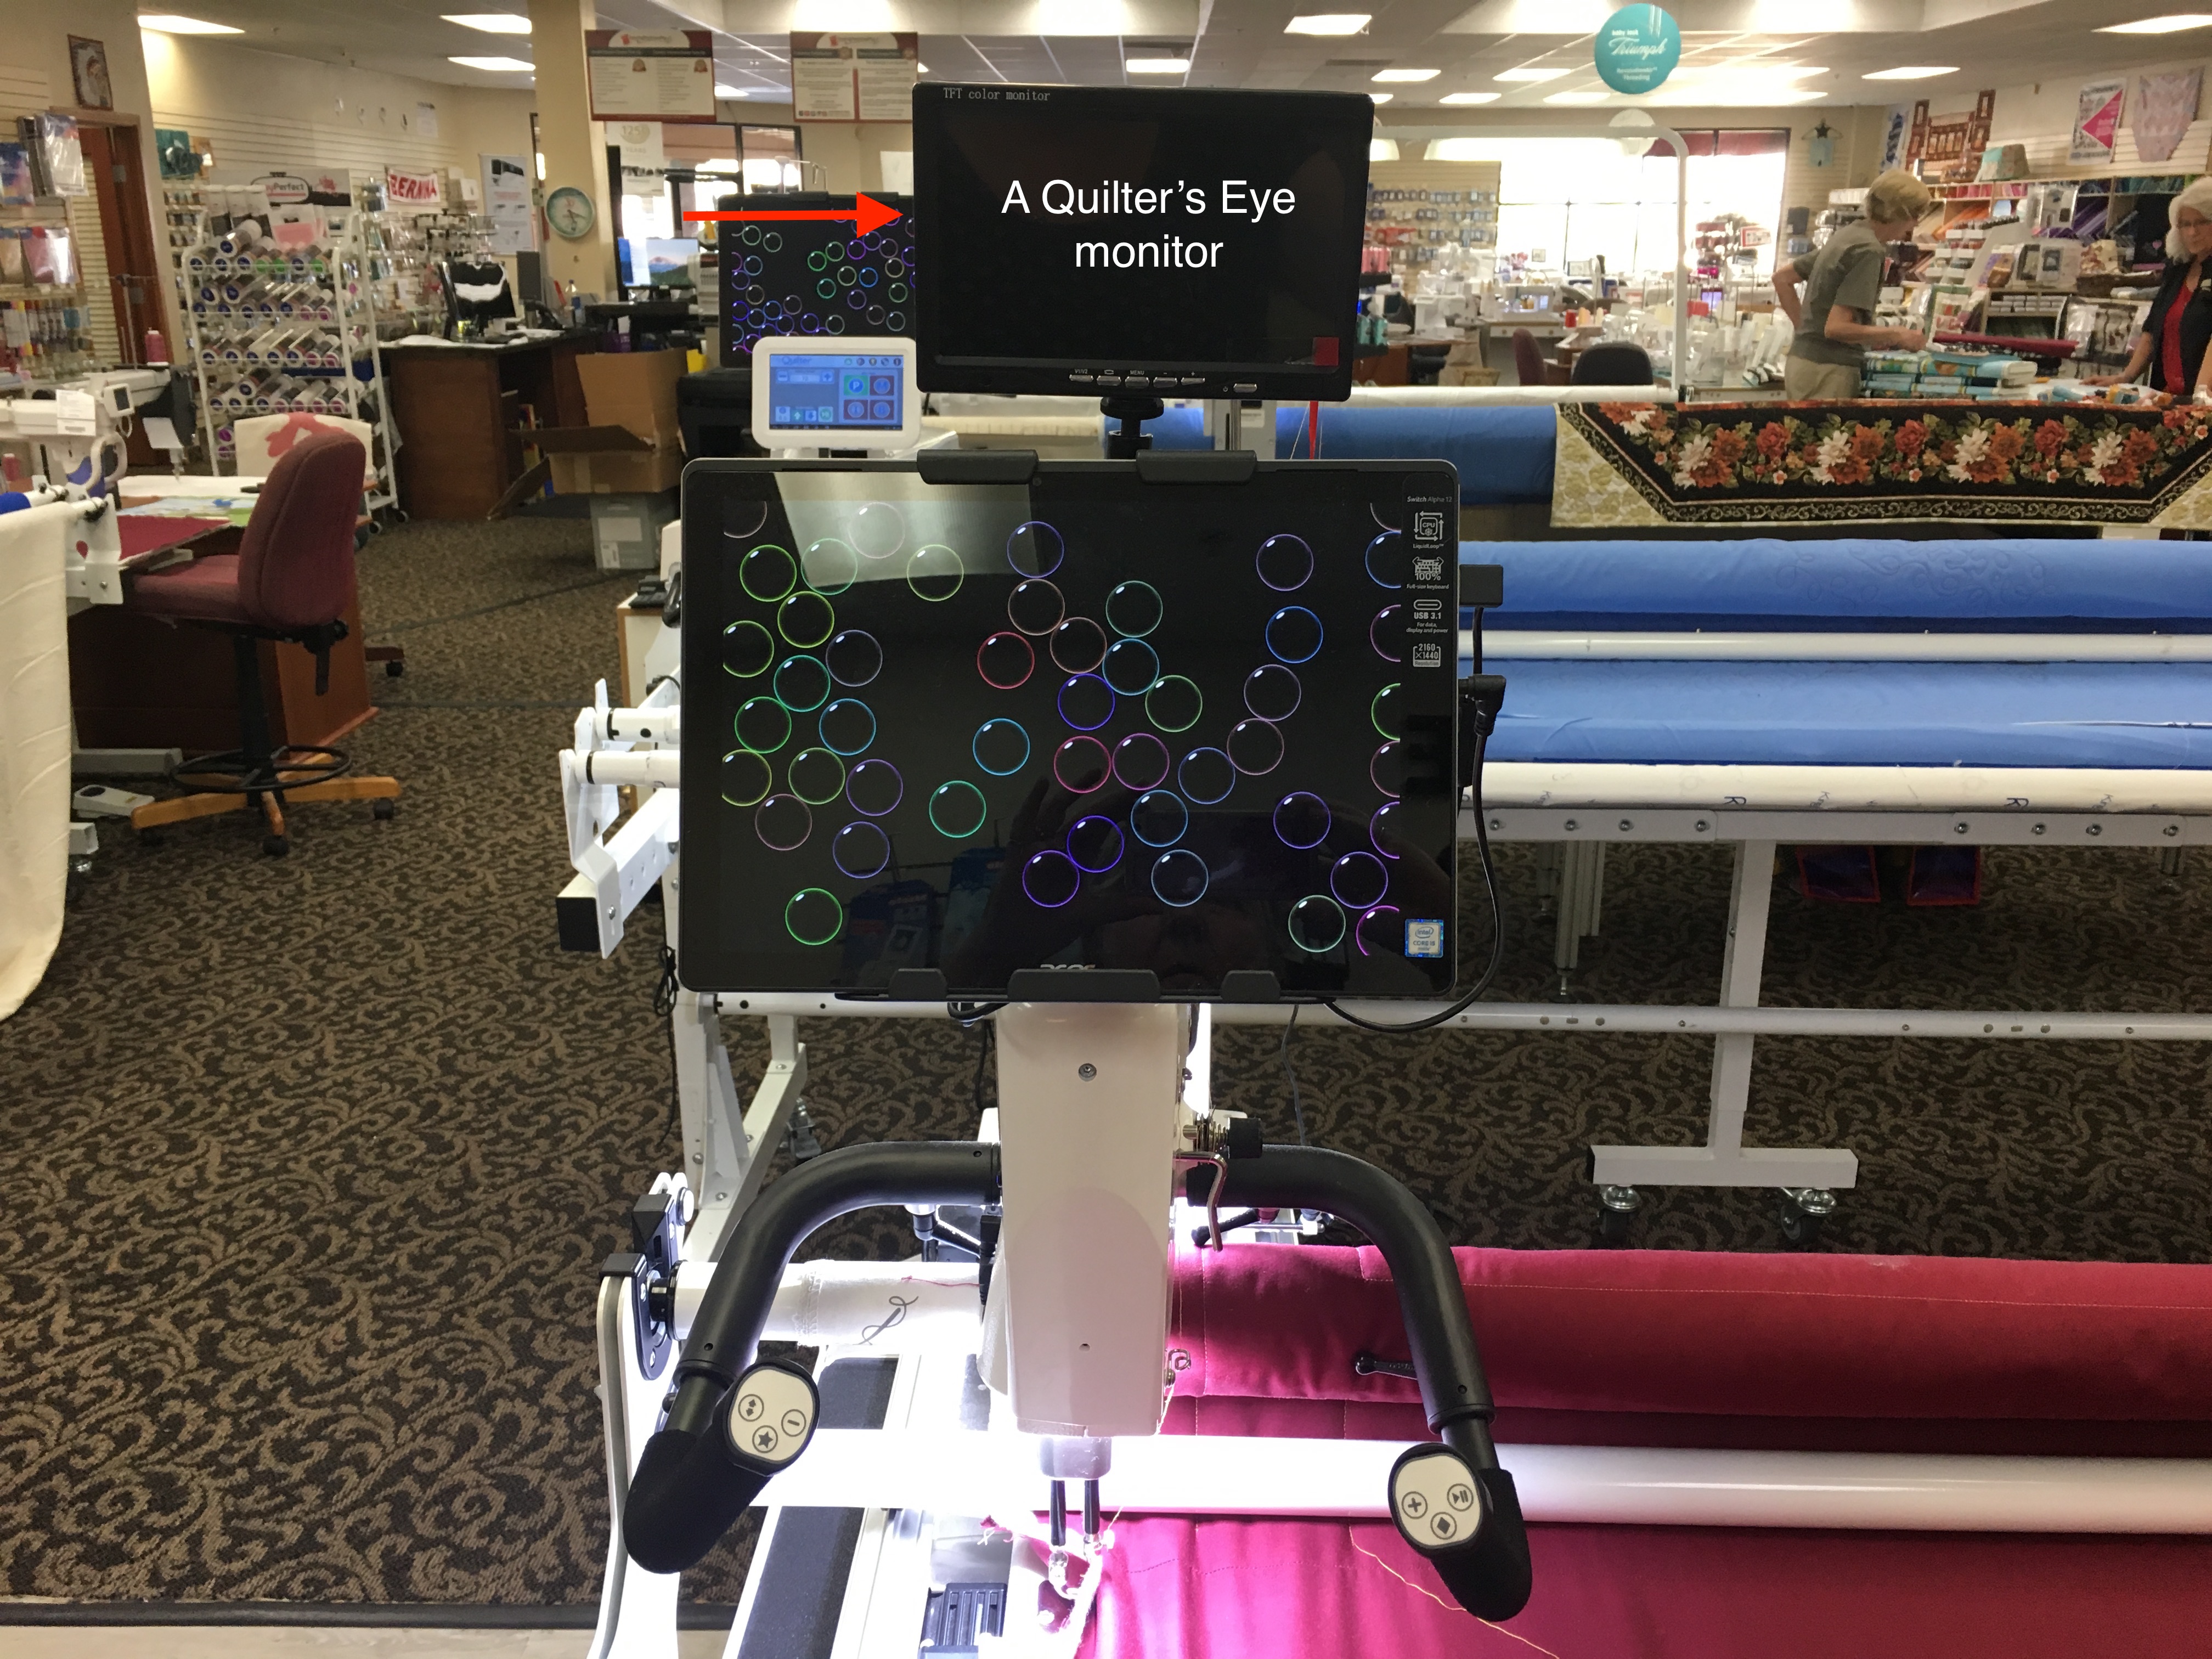
A QUILTER’S EYE (NEW EDITION) INSTALLATION MANUAL
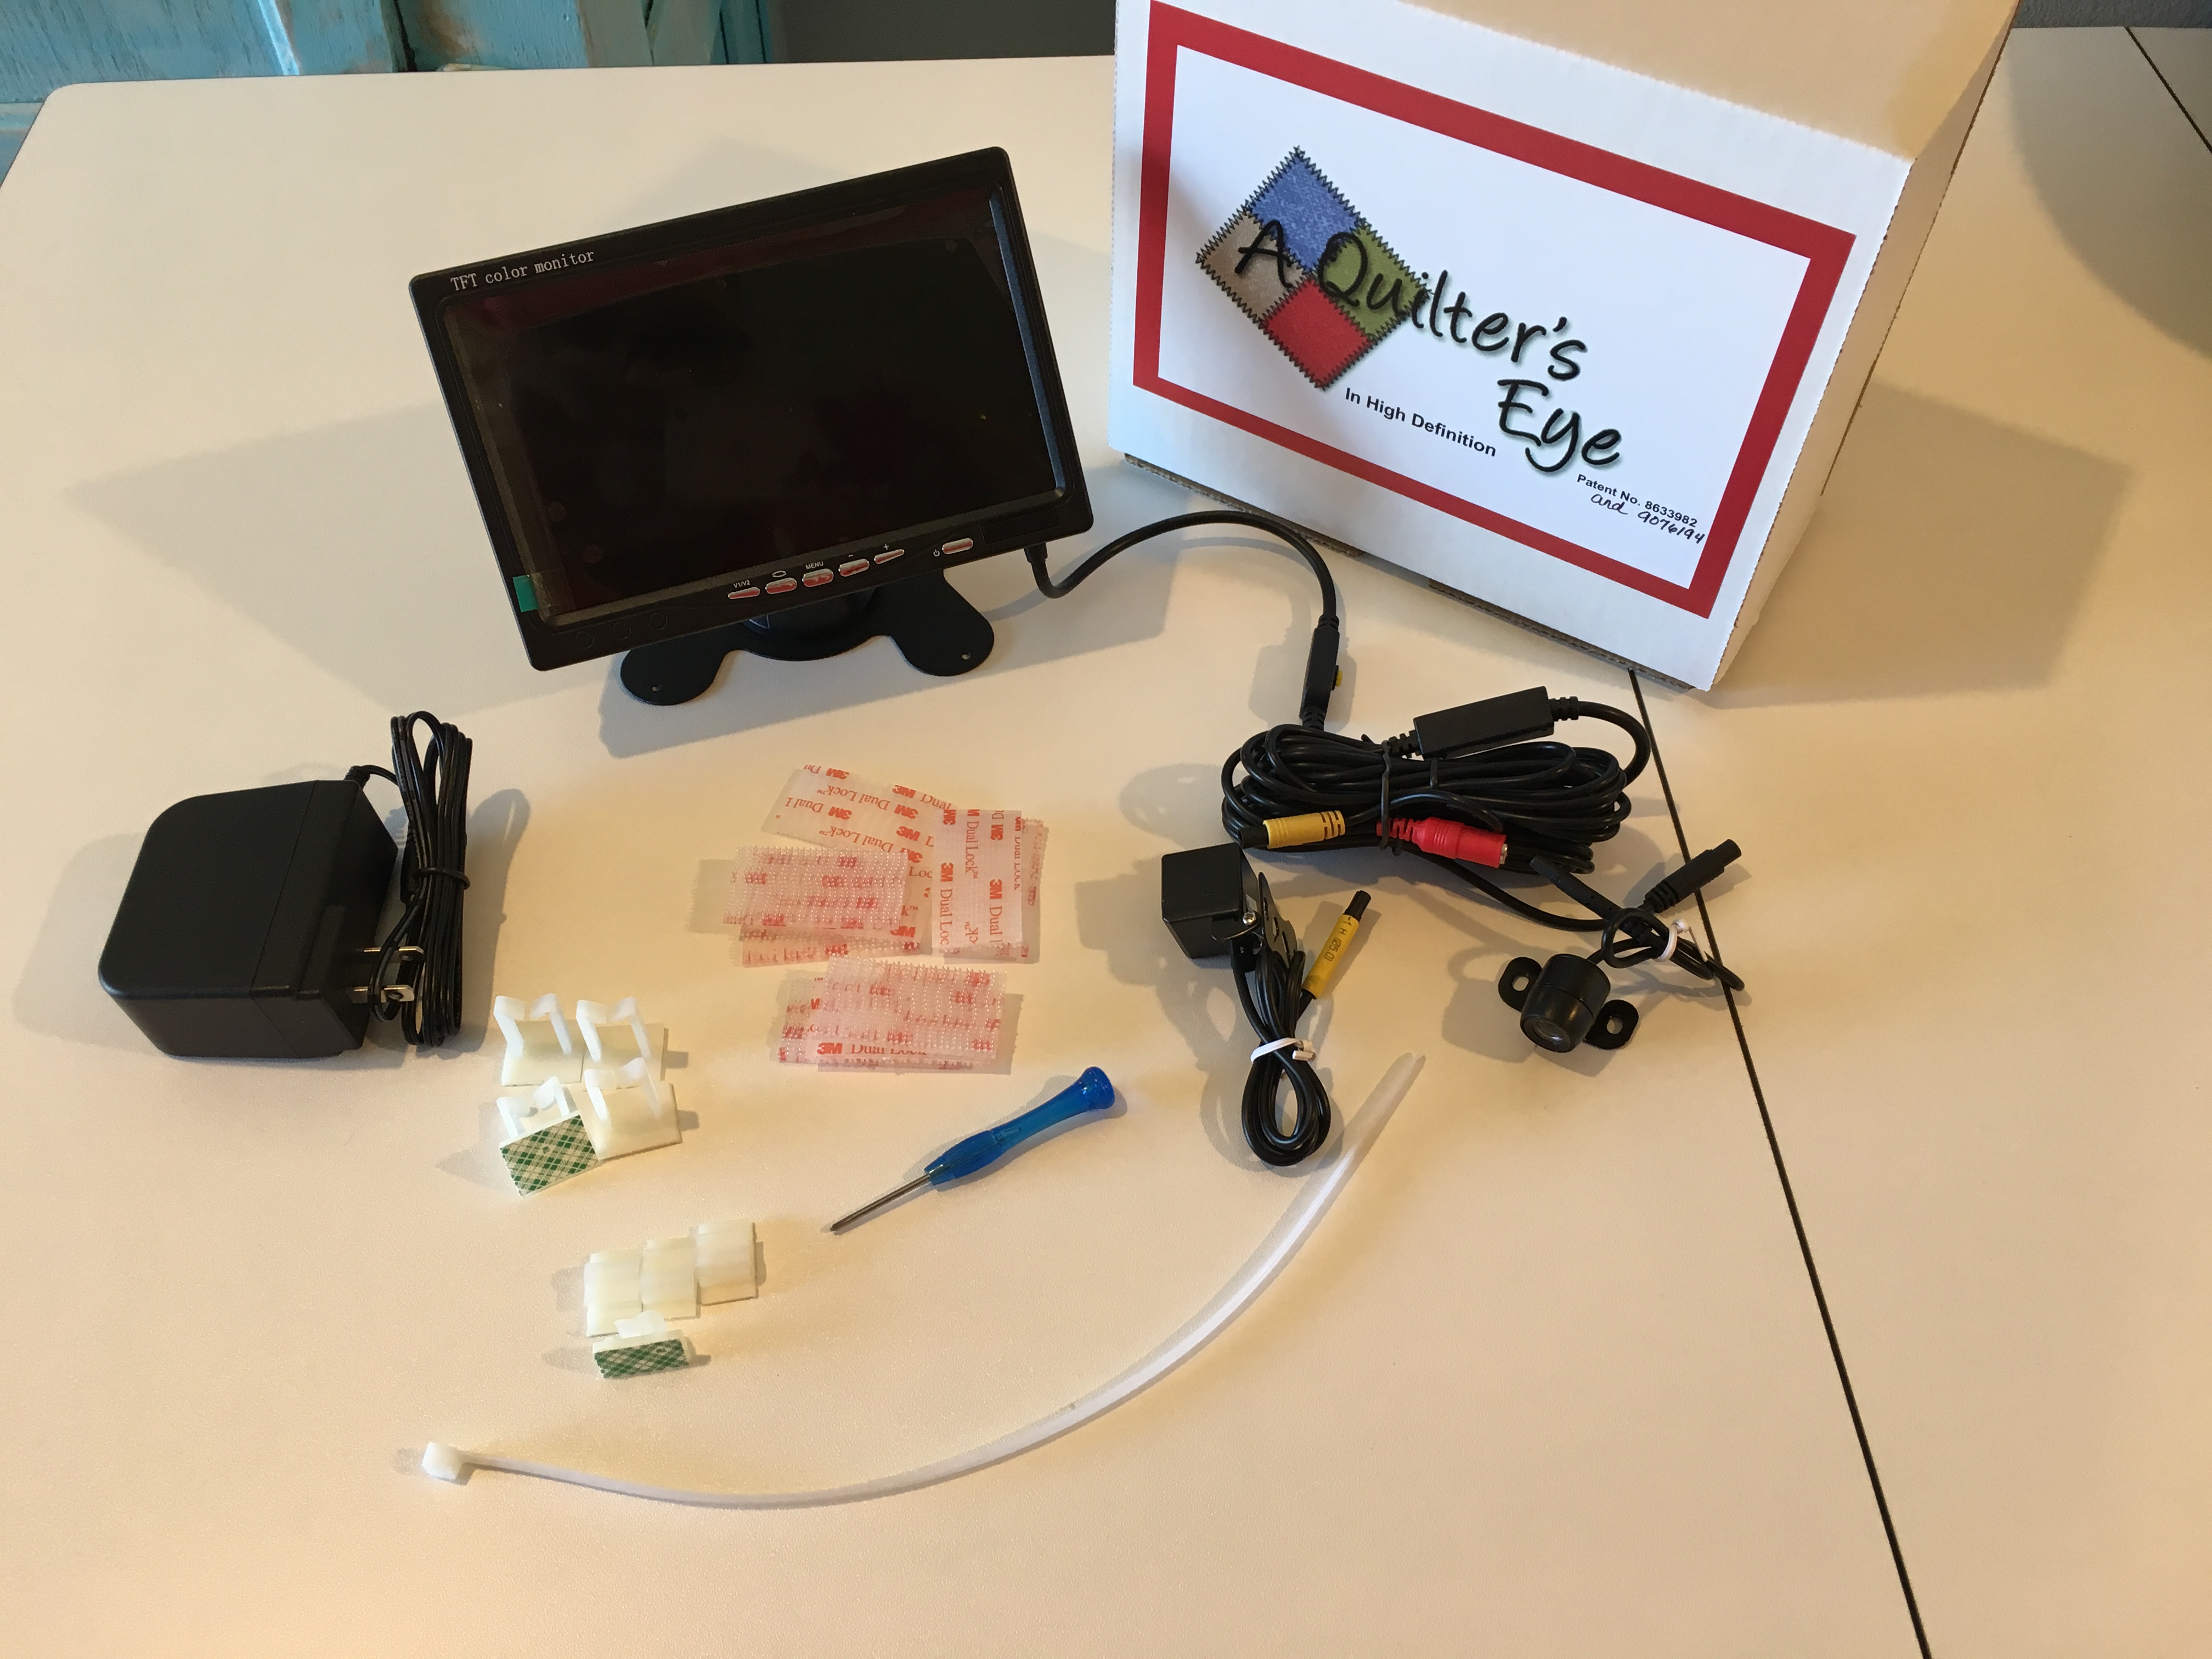
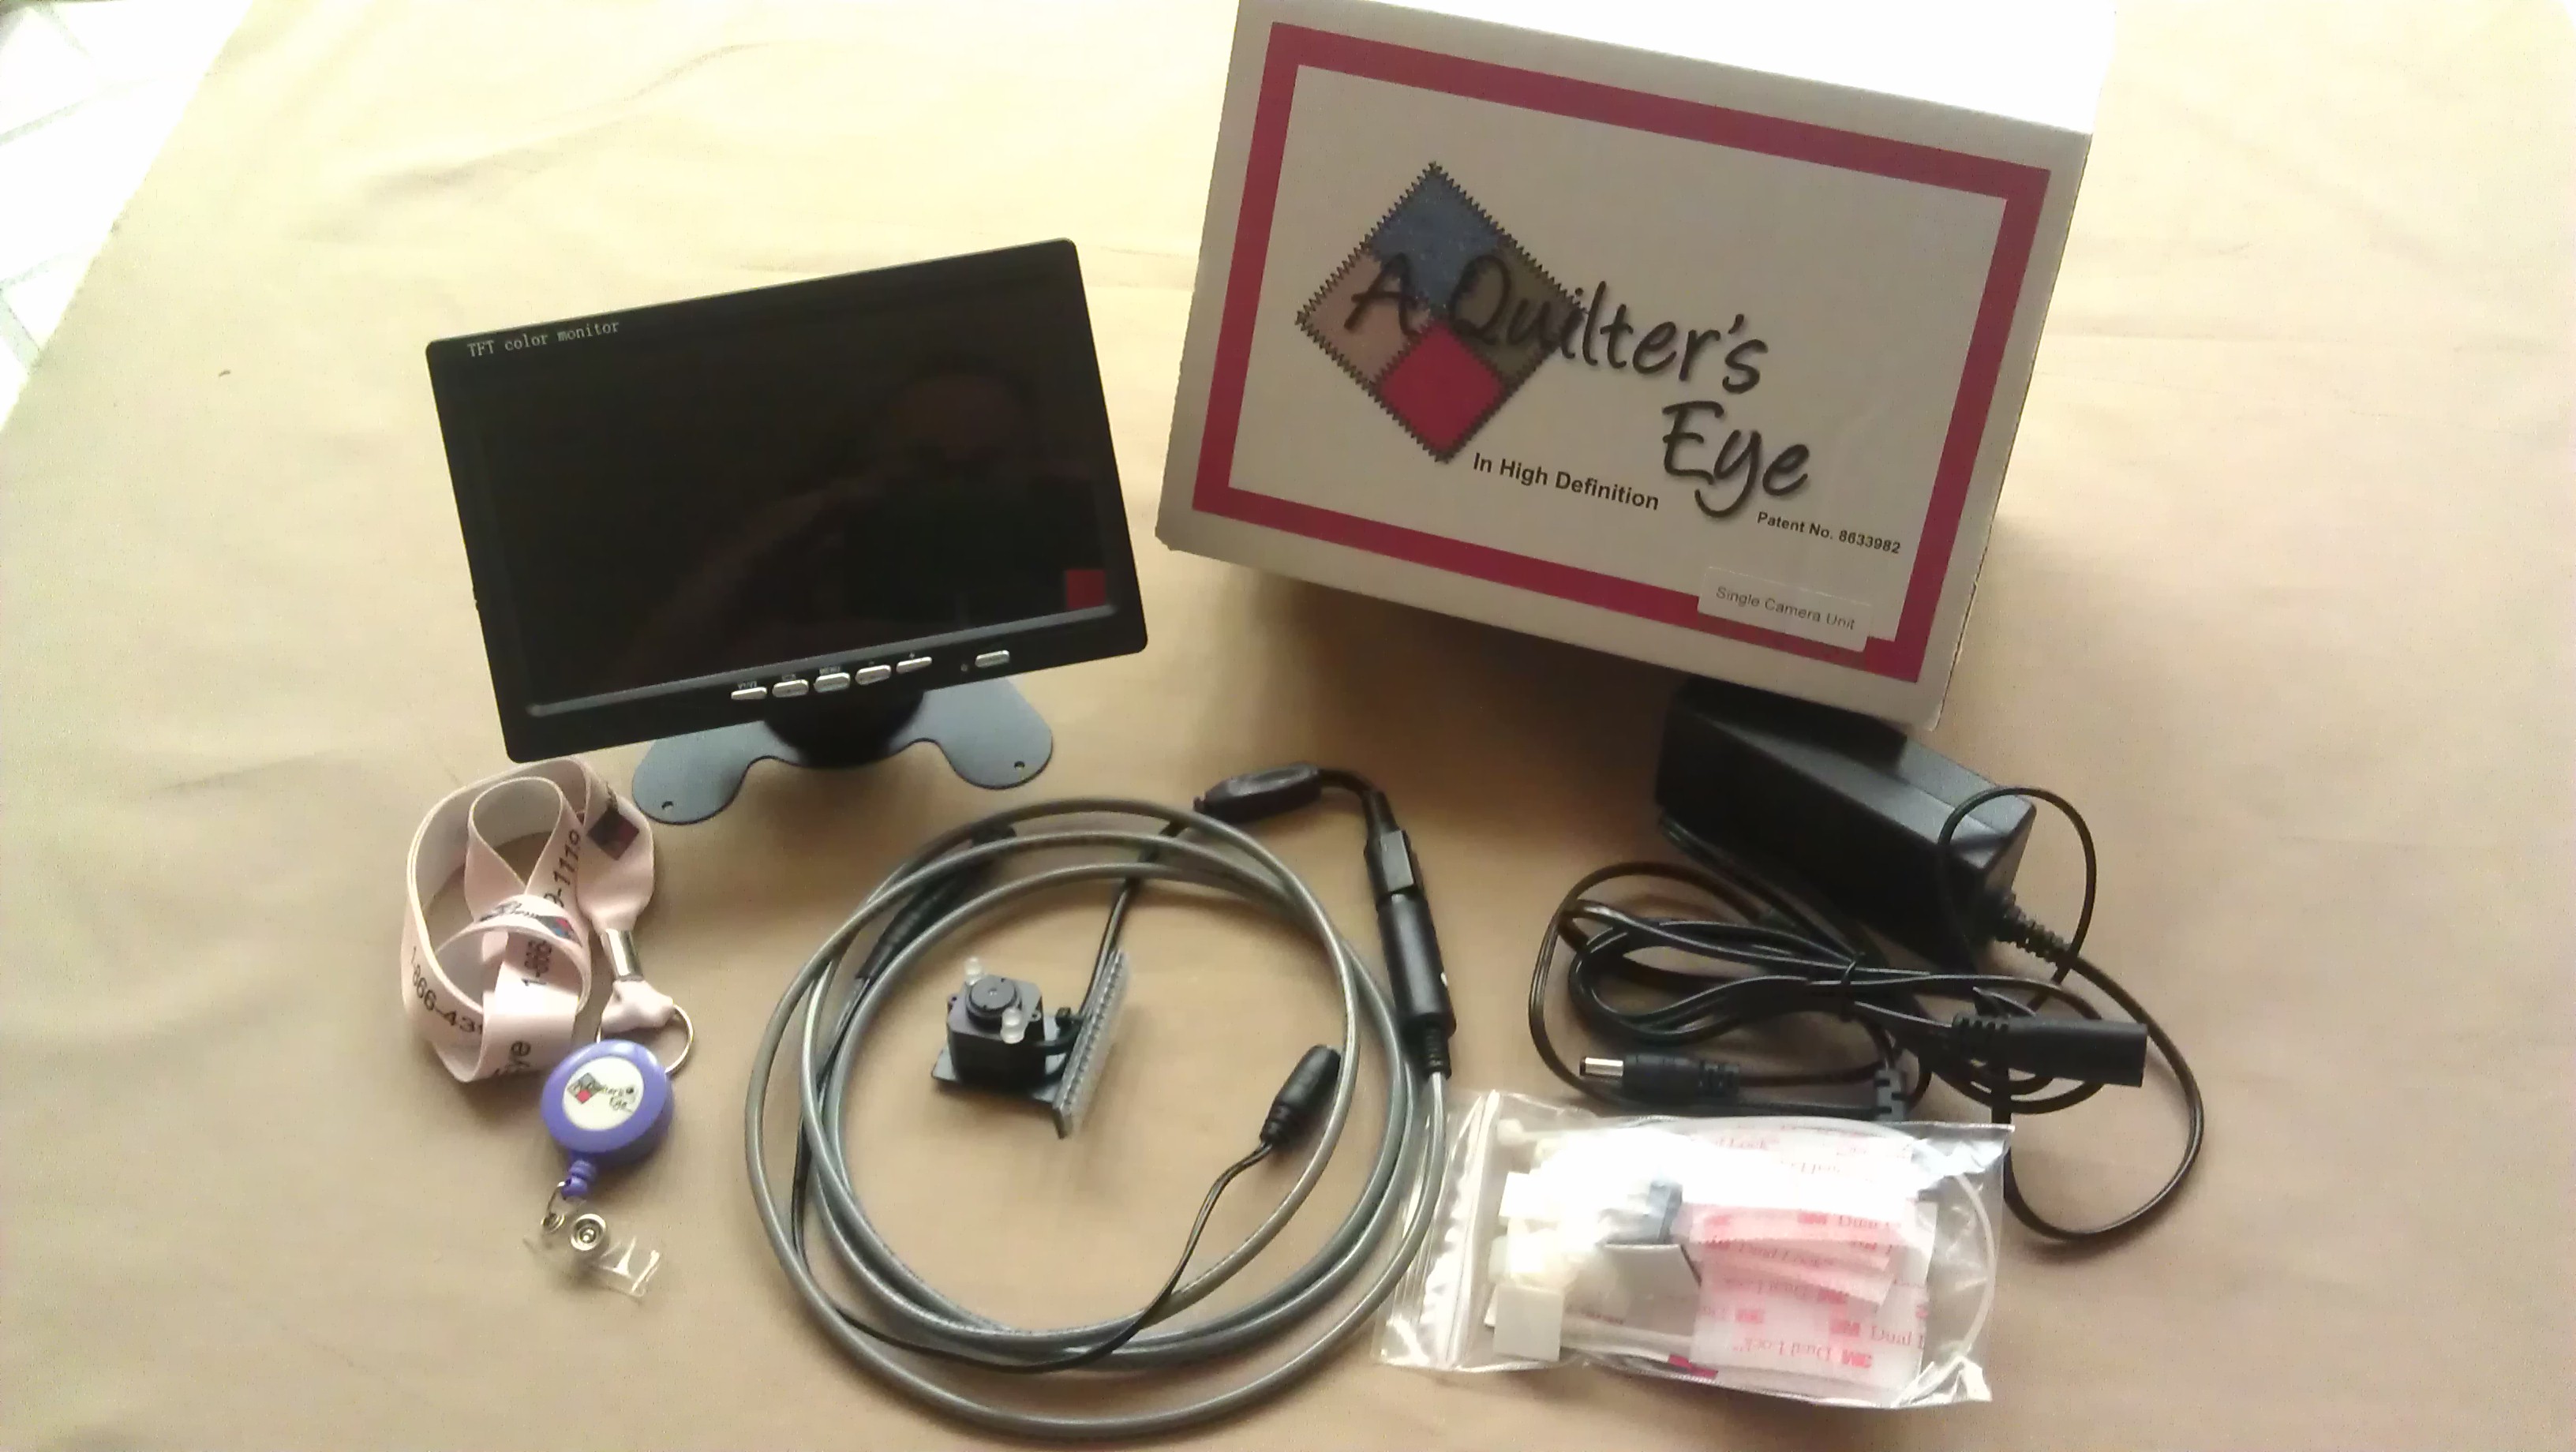
Included in the box: 7” LCD monitor screen with mounting bracket installed and necessary cables, stitch camera w/mounting bracket, heavy duty power supply with cord, package of clips and supplies to attach unit, and “pantograph” camera (if ordered as dual unit).
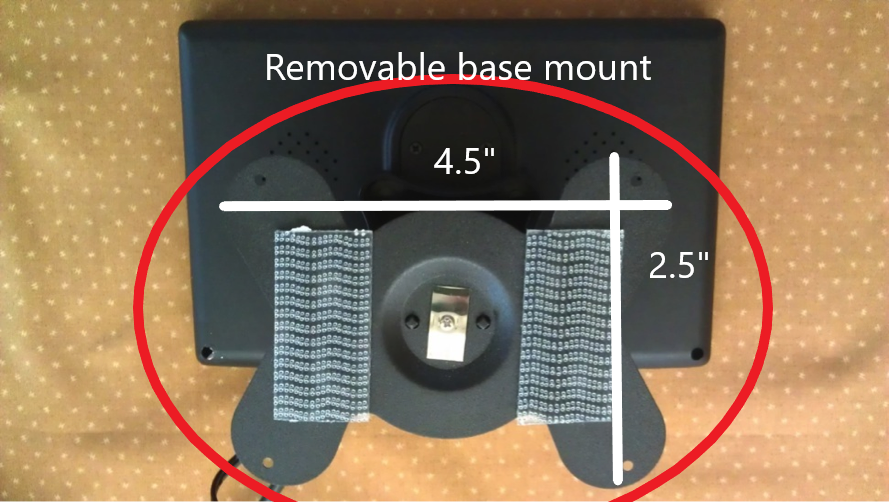
- Look at your quilting machine and determine where you desire to mount A Quilter’s Eye (i.e., top front using the bracket/top back, left side wall or on the handle bars of your longarm). The monitor can swivel on the base if you need to change the view from the front of your machine to the back and can be raised or lowered.
- Wipe the area clean of surface dust or oil where the monitor, camera and clips are to be installed.
The dual lock strips we have included have a strong adhesive and can possibly remove machine paint if they need to be moved once adhered. Before removing adhesive backing to apply the strips, we recommend experimenting with placement and then marking where you desire the strips and clips to be.
- First, install the monitor and connect the camera and power supply as follows:
- Peel away the sticky back from 2 strips of the dual lock. Adhere them on the top of the longarm as shown. Leaving up to as much as 1″ in between strips.

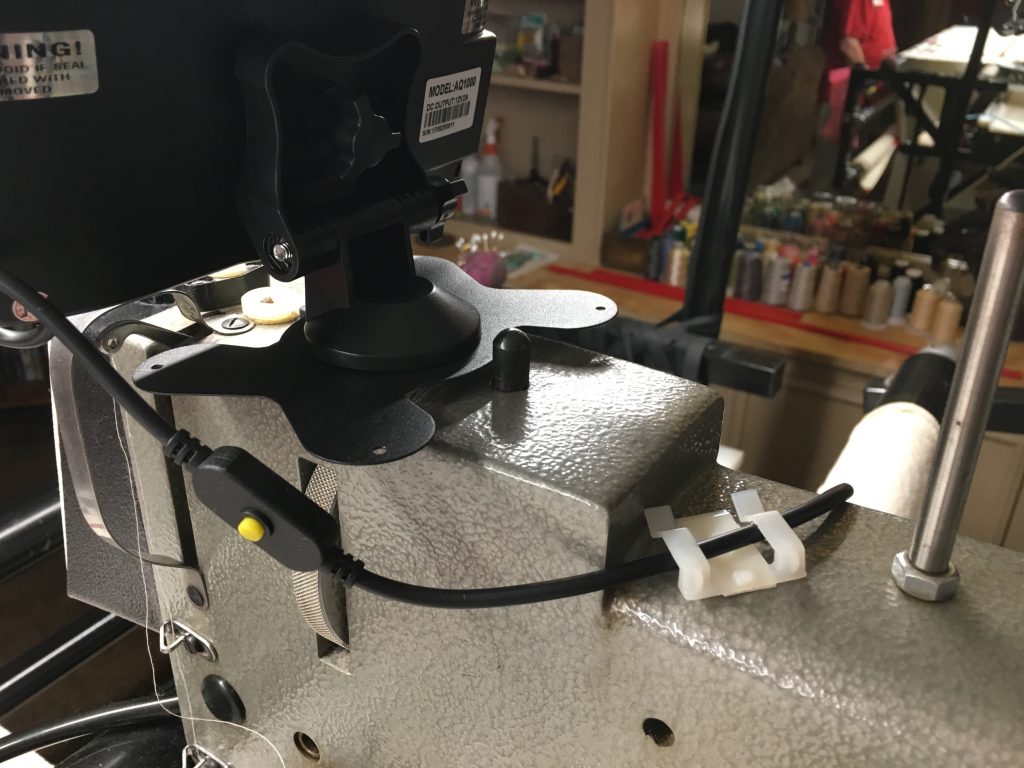
- Press 2 more strips of the dual lock to those you have already applied, peel away the backing and firmly press the monitor in place onto the dual lock strips.
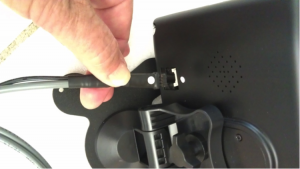
- Notice the tiny paper tab in the corner of the monitor. Holding the monitor base down with one hand carefully pull the tab upward and across to remove the monitor screen protector. The screen can be tilted to your preference by loosening the thumb screw on the left back. Tilt the screen to your best view and tighten.

- Once the monitor is mounted, we’re going to start feeding the cables through the provided clips starting at the top by anchoring the cable a few inches past the camera on/off switch (yellow button).

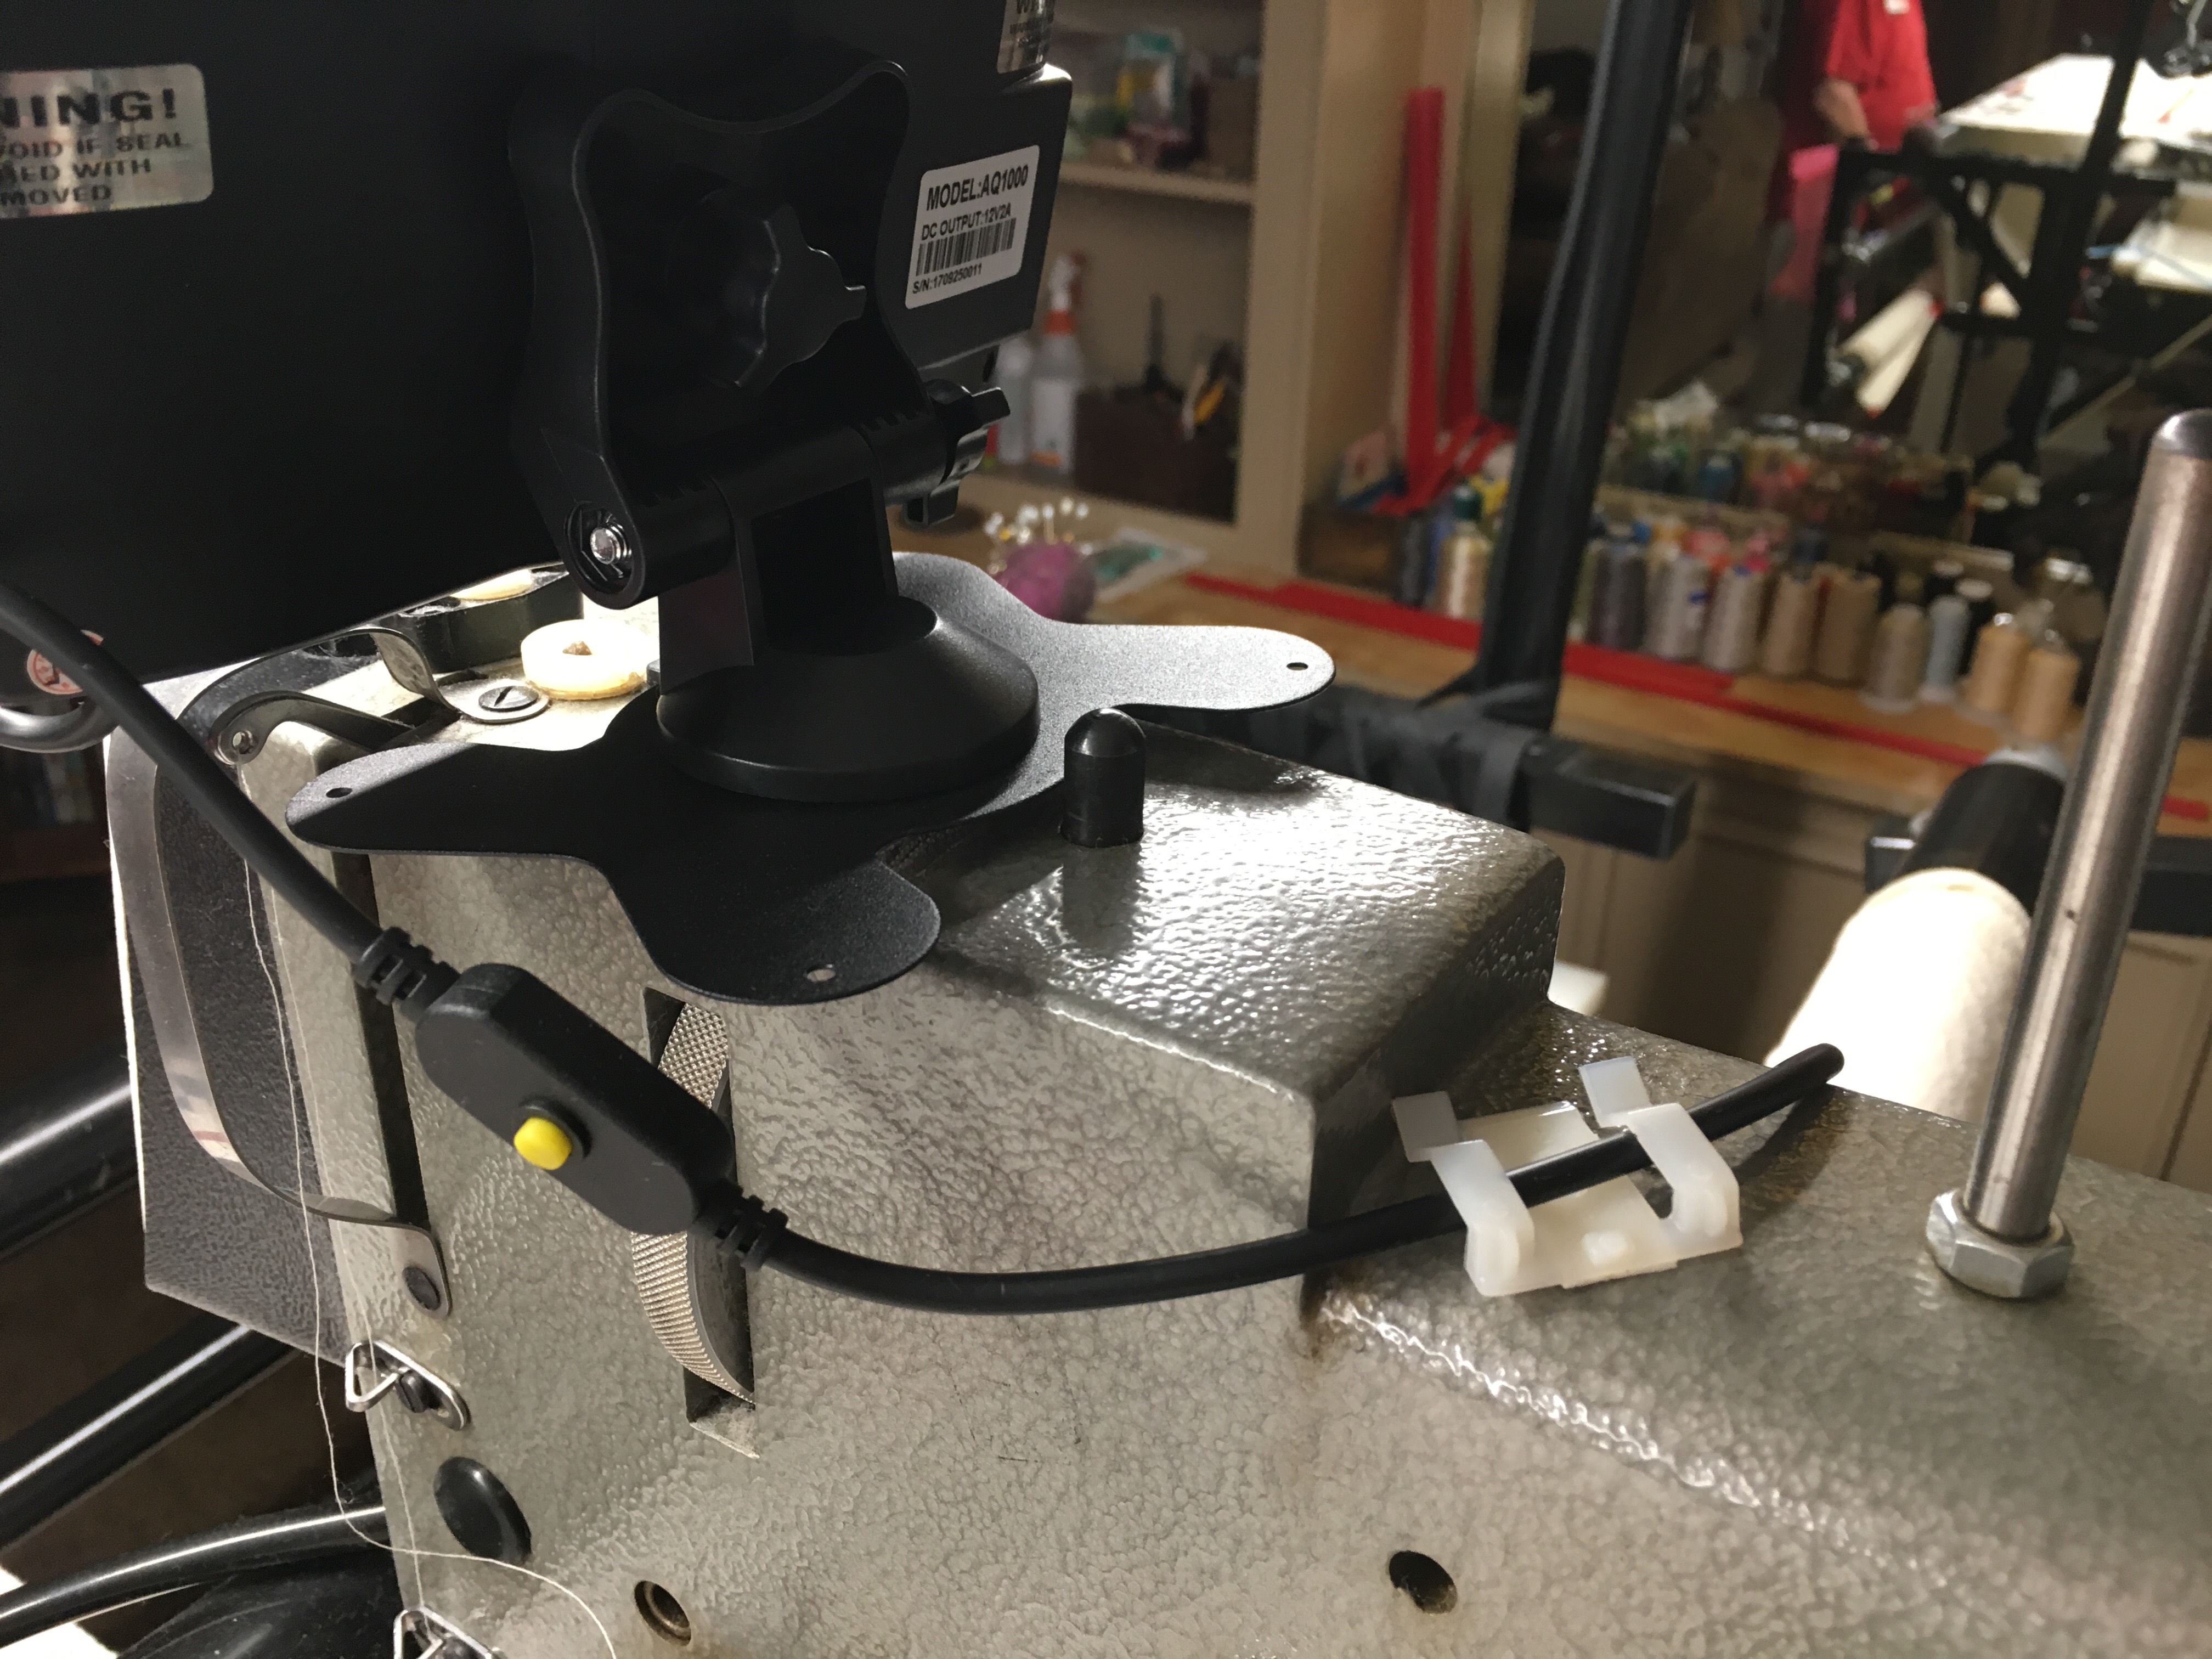
- The two camera cables have been tied together. Remove the tie and take the cluster of cables tied with the black tie and untwist.
-
- Take a few clips and slip the cable into them.
-
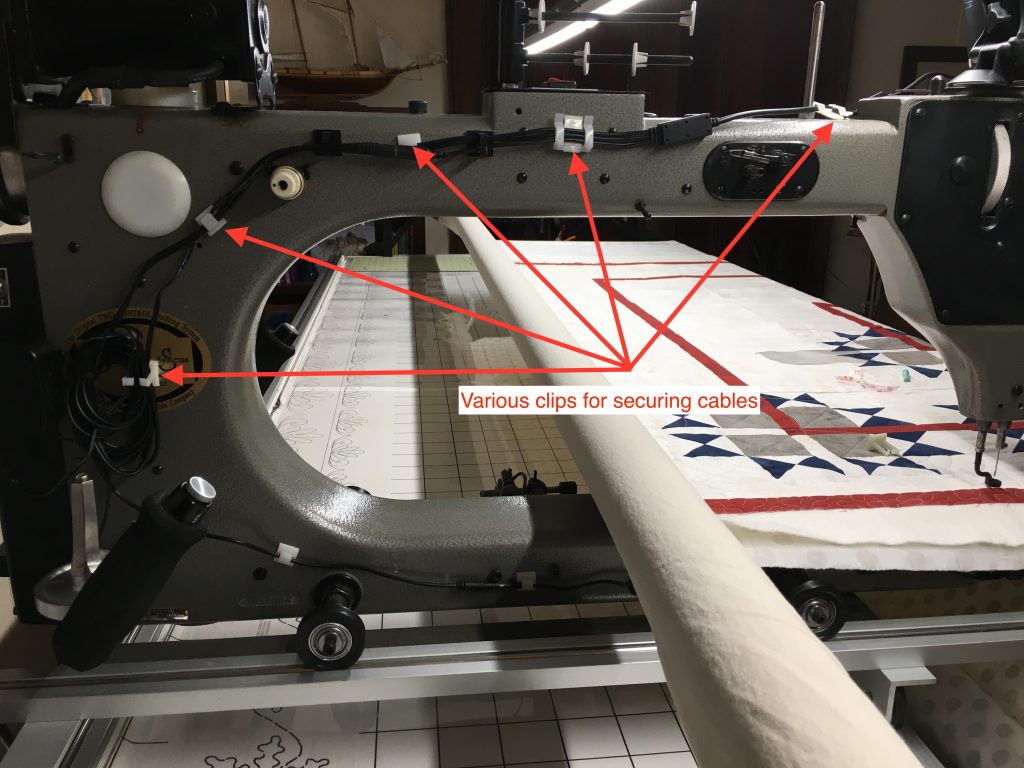
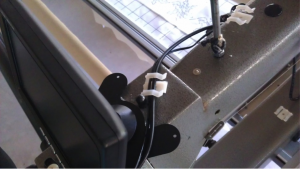
- Starting several inches from the clip at the top and before peeling off the paper backing, take the clips and slide them every 5 to 7 inches apart along the upper left side of your quilting machine heading to the back. Peel off the thin layer of paper on each clip and secure to machine. Sometimes the paper backing is difficult to remove. We recommend sliding a straight pin or bent paper clip just underneath the paper to start the peeling. Continue adding and securing clips down the side and now moving forward to the front of your quilting machine (see photos).
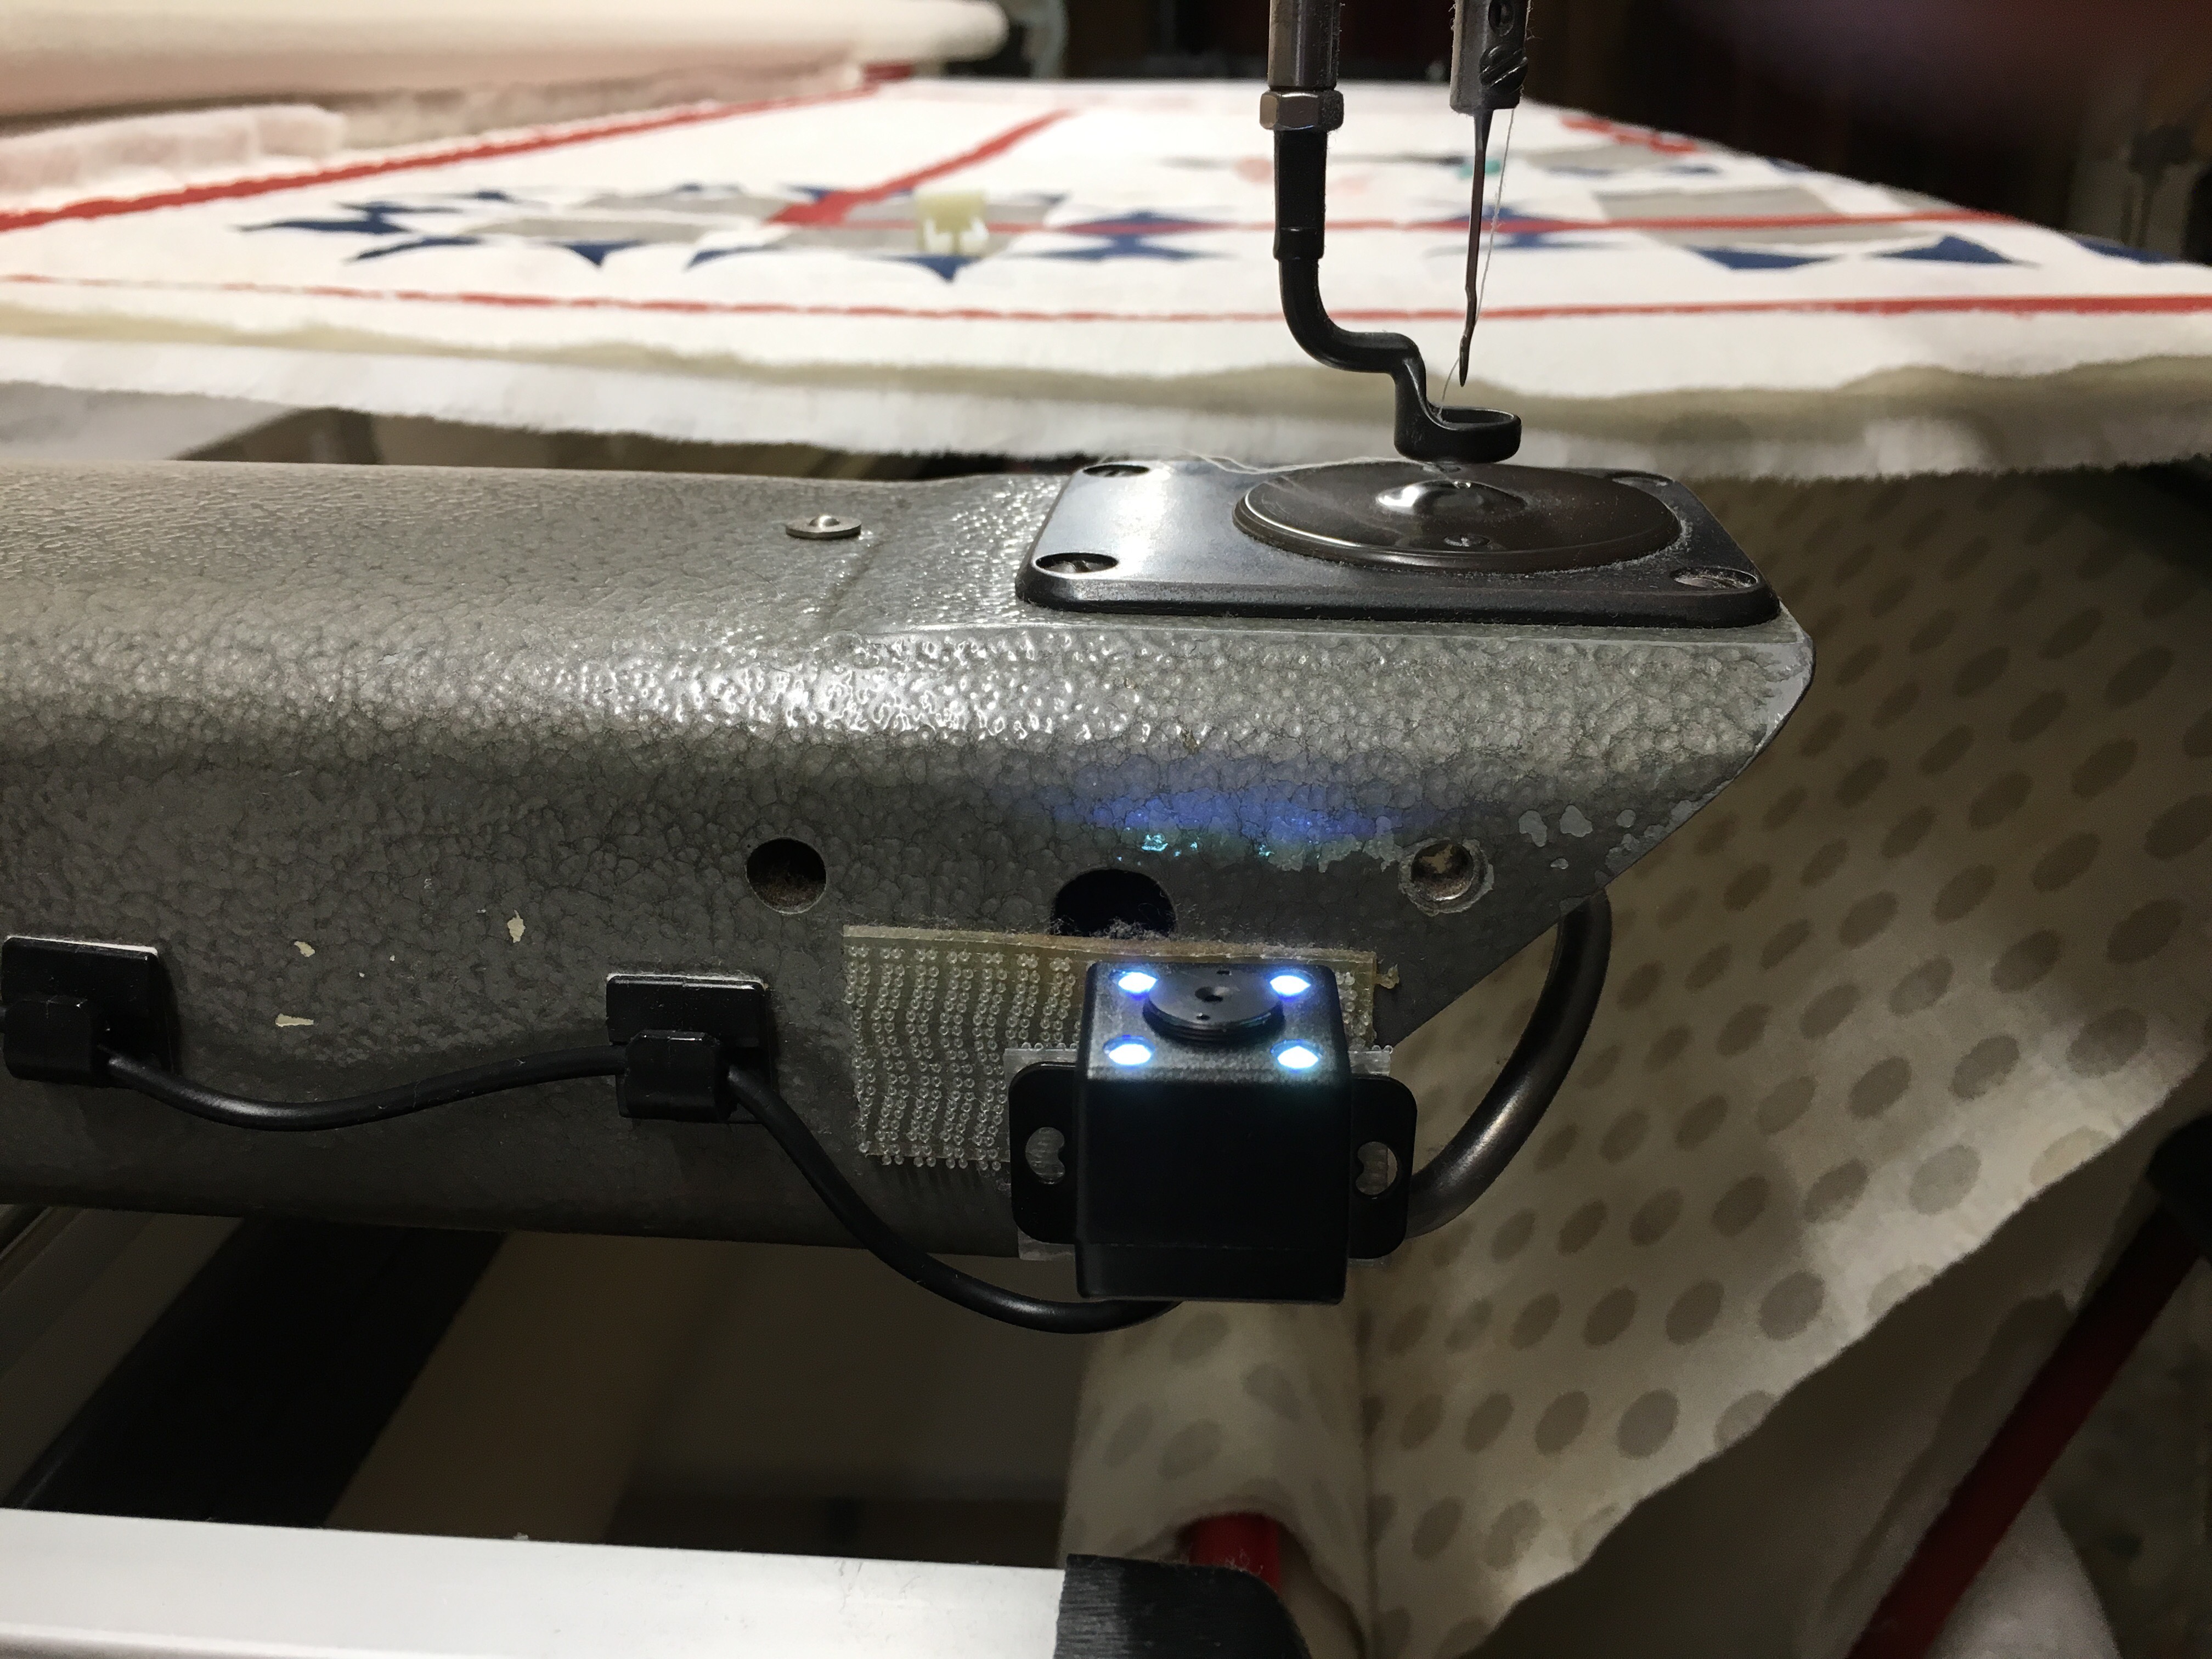
- Take a piece of dual lock and attach it to the bracket of the stitch camera (camera with four small LED lights).
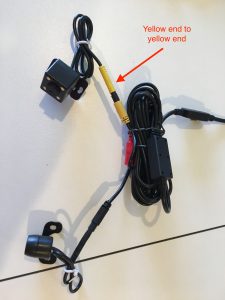
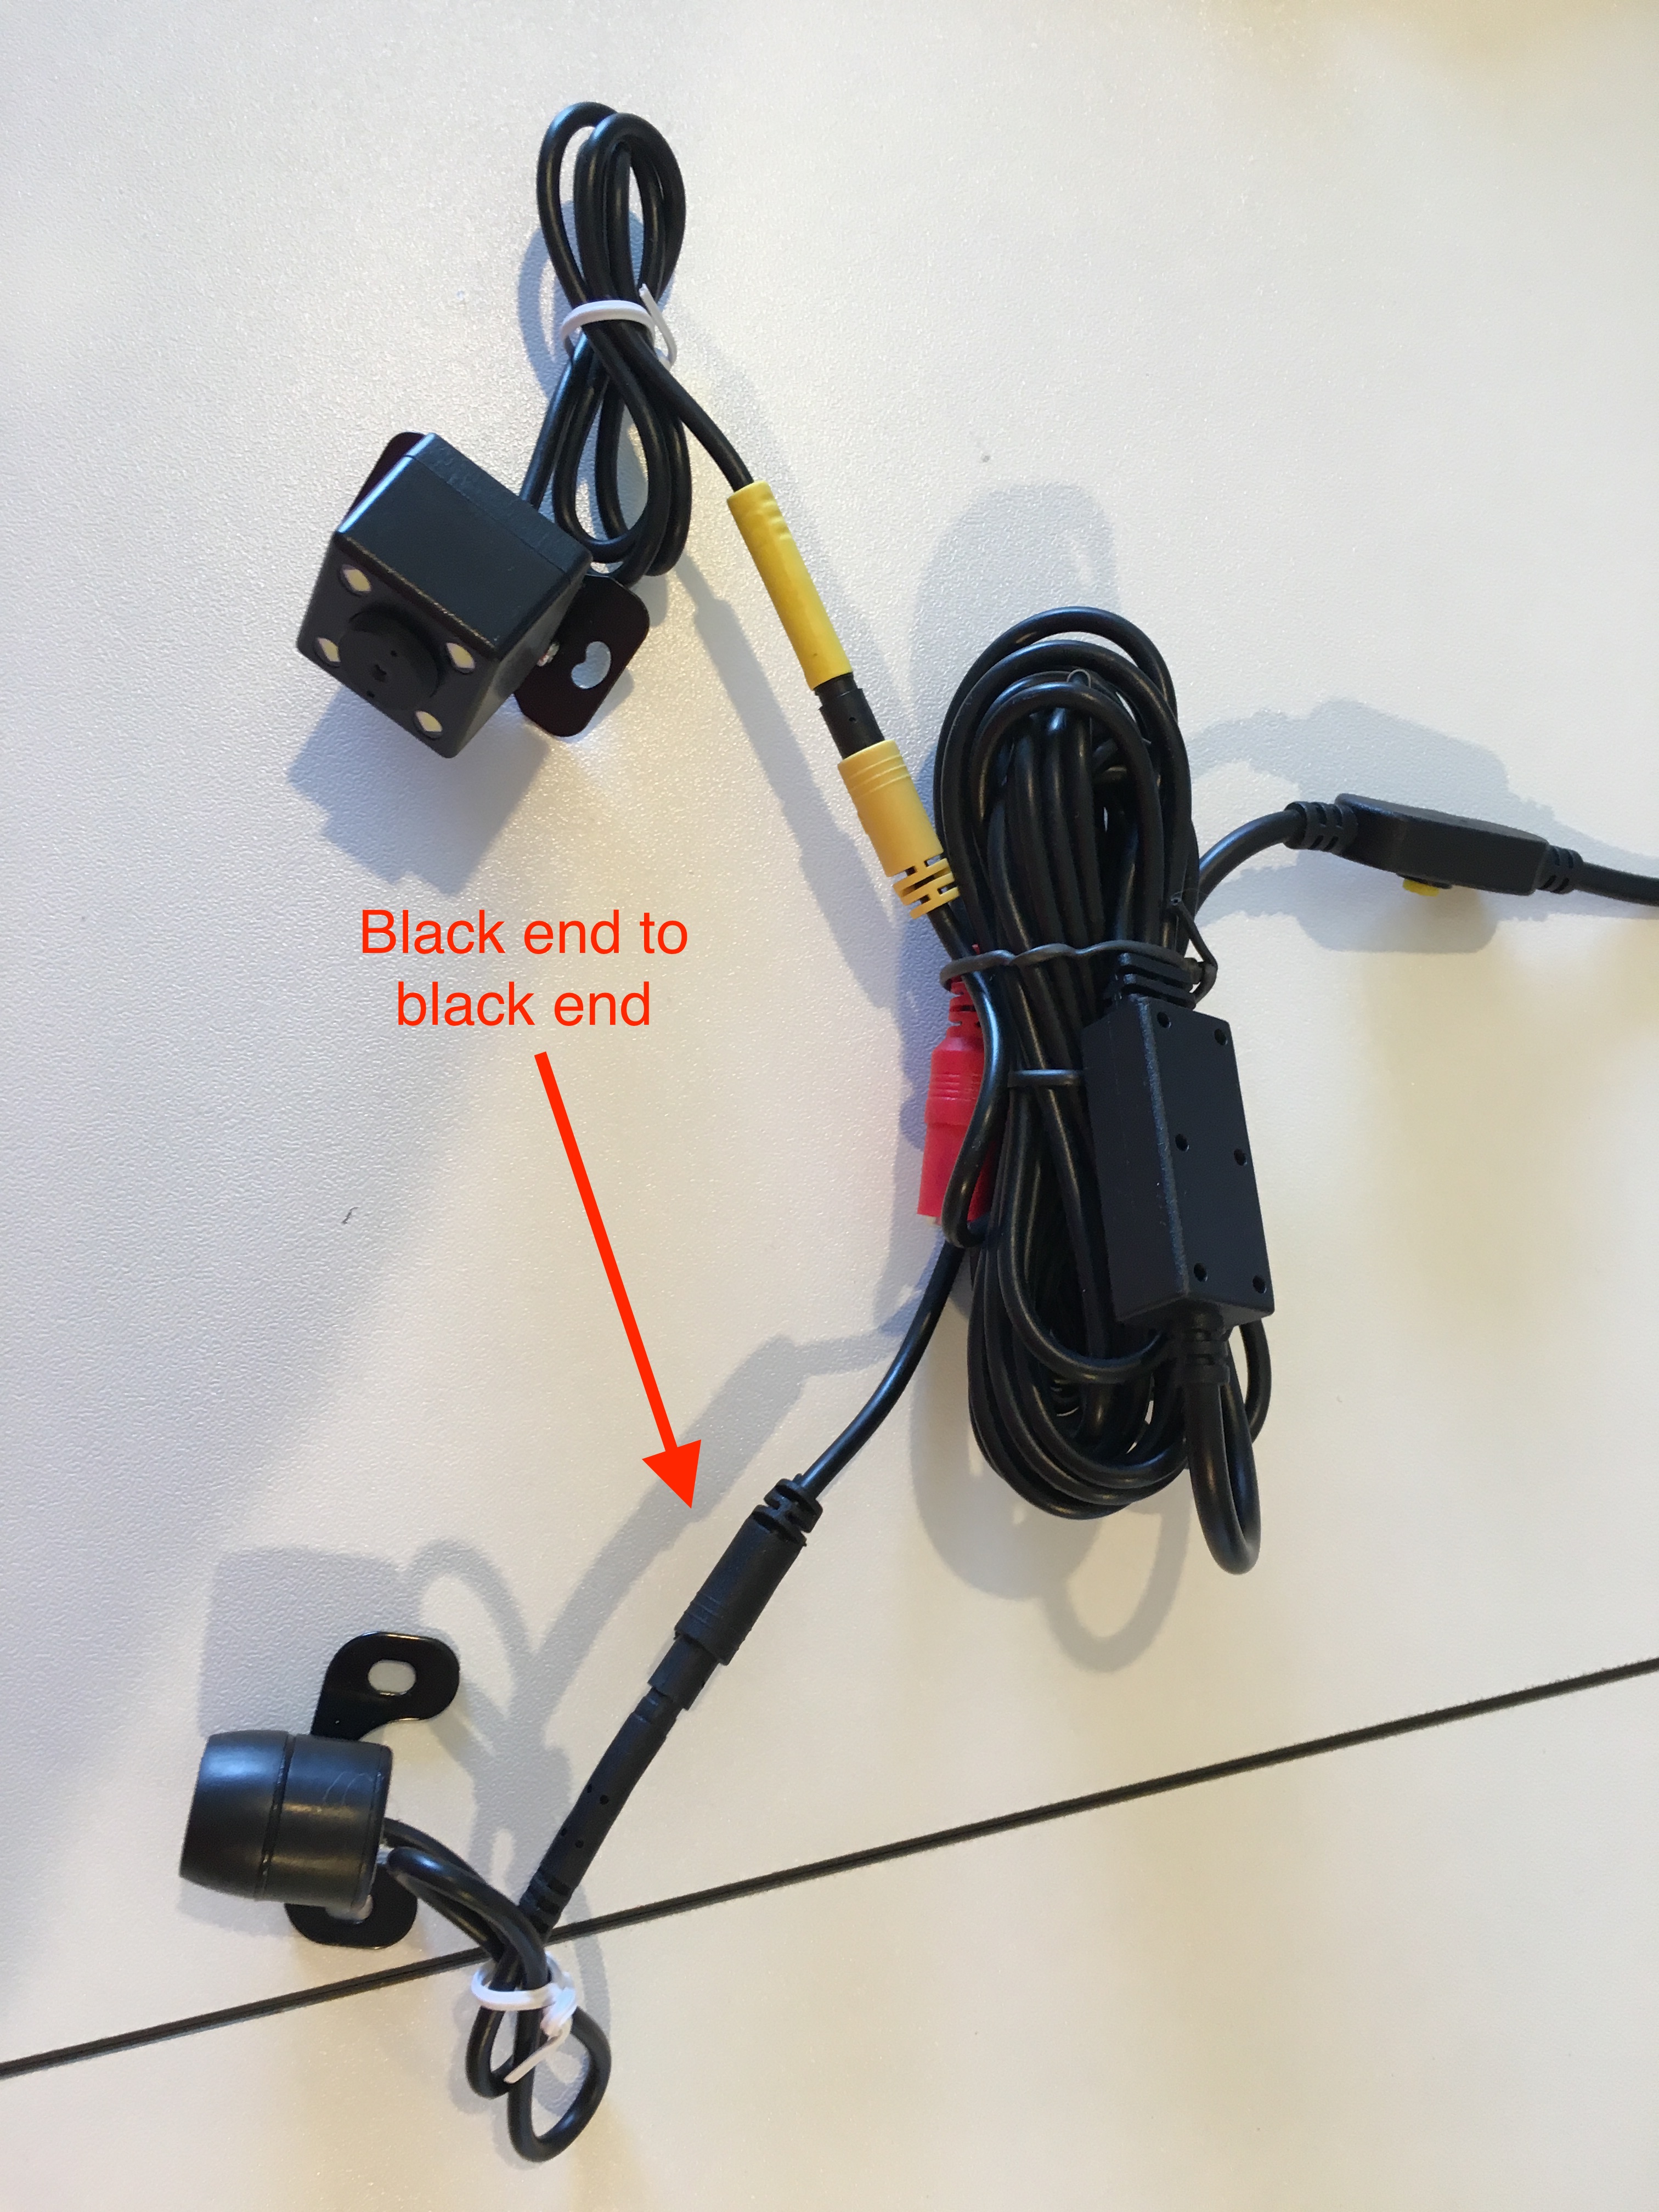
- Connect the yellow end of the cable to the yellow end of the stitch camera.
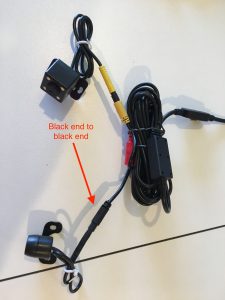
- If you purchased A Quilters Eye 2, connect the black end of the cable to the black end of the laser camera.
- Push the red end into the power adapter (packaged in its own box).
***If you purchased a single camera unit, using some of the clips, feed the laser camera cable to the back of your machine and secure.
***IMPORTANT***
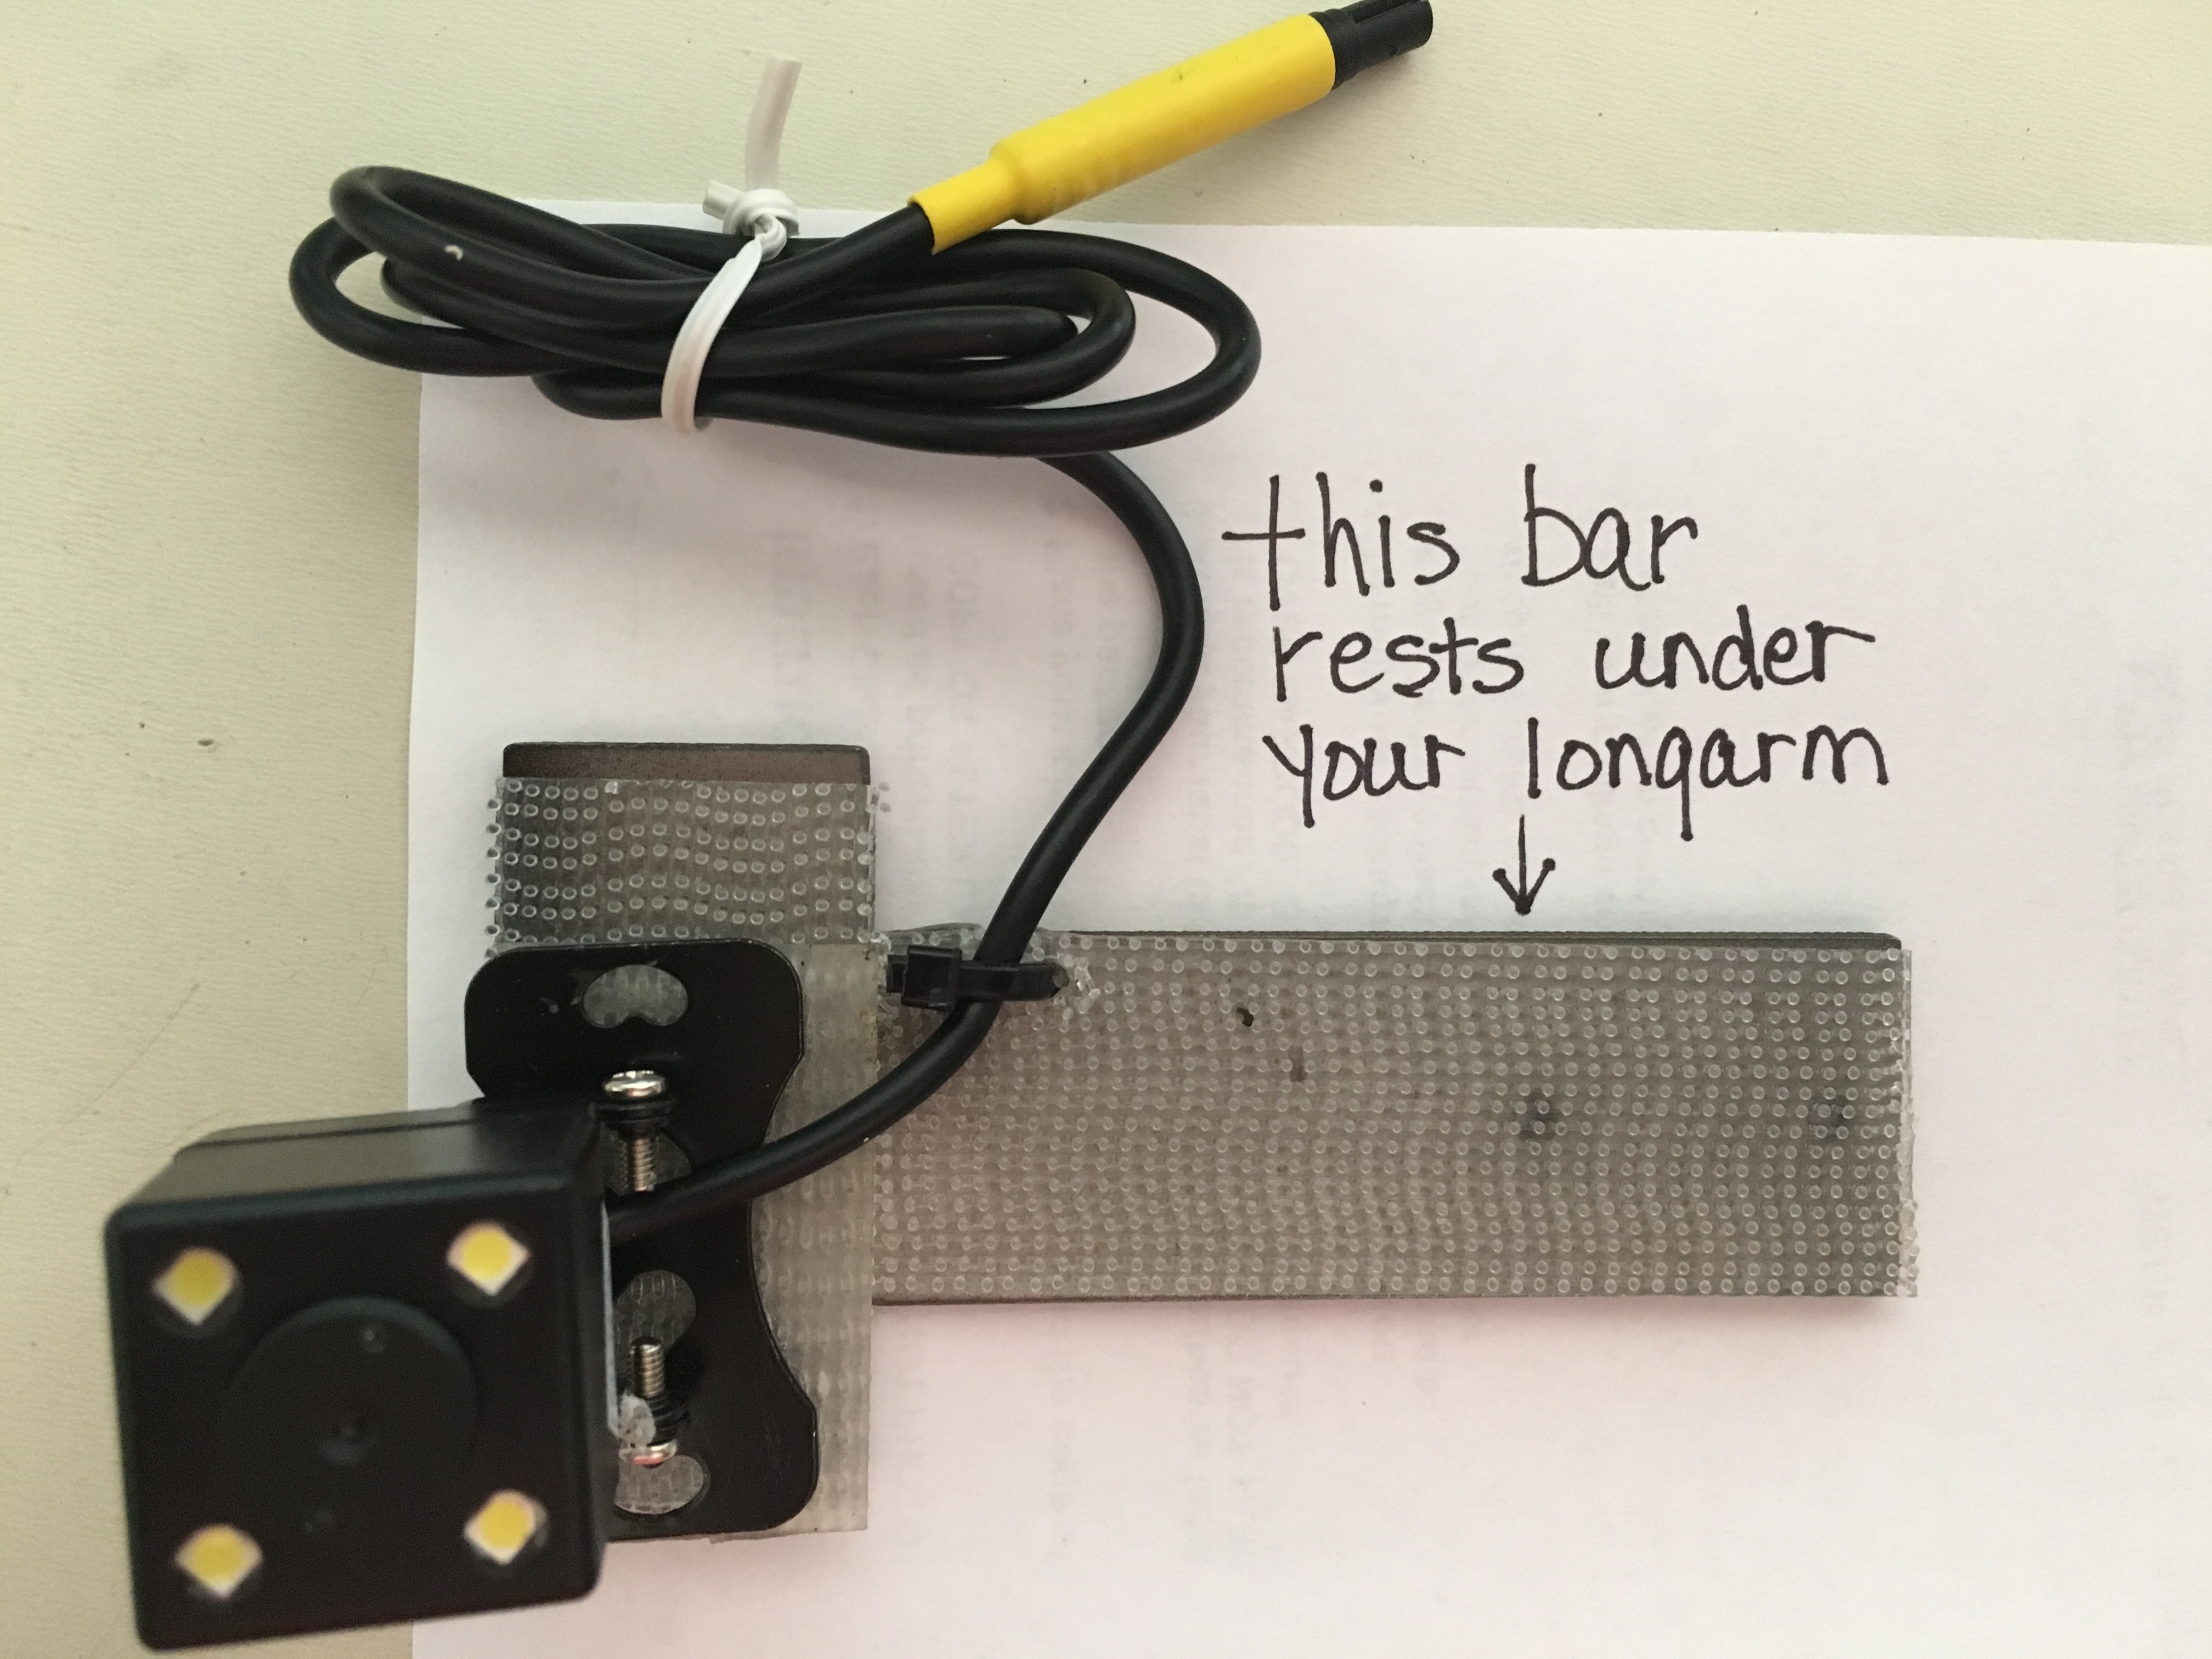
We focus our stitch cameras at 1 inch from the top of the camera to the backing fabric. This is the best and most magnified view. Please place your dual lock strip as close to the front of your longarm as you can, keeping in mind that when you press the camera bracket into it, the top of the camera should be 1 inch from the backing fabric.
-
-
- Make sure you have a small clip close to the dual lock piece.
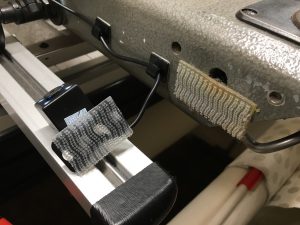
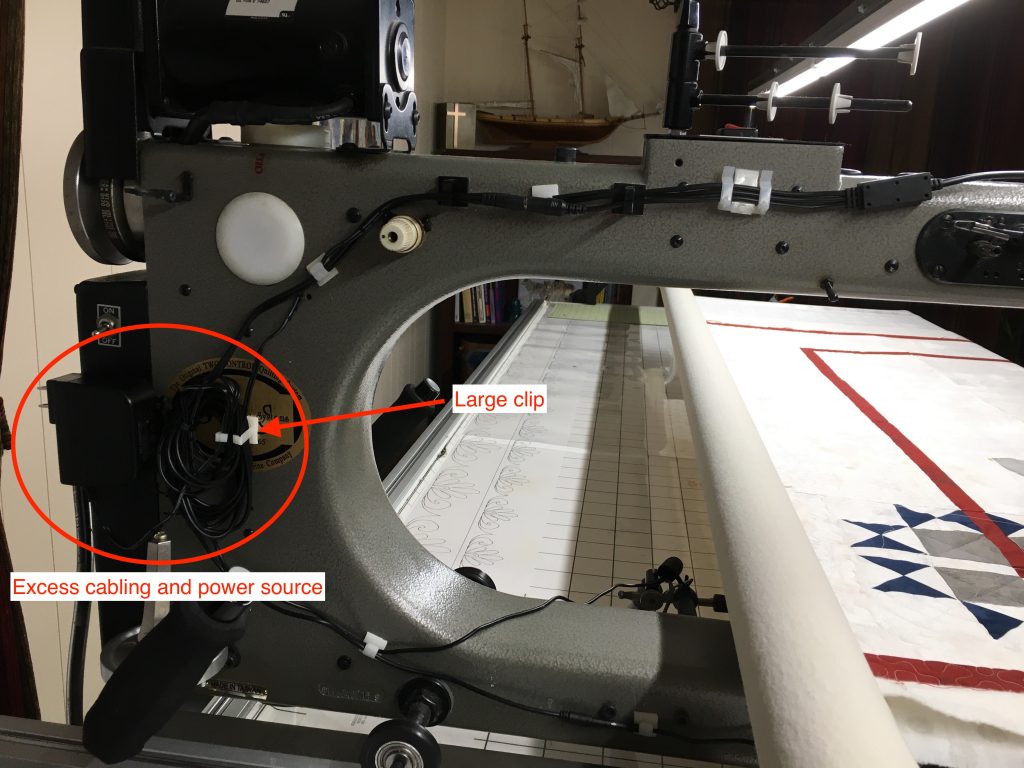
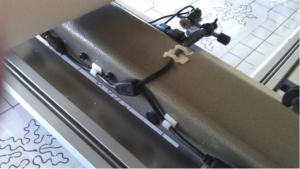
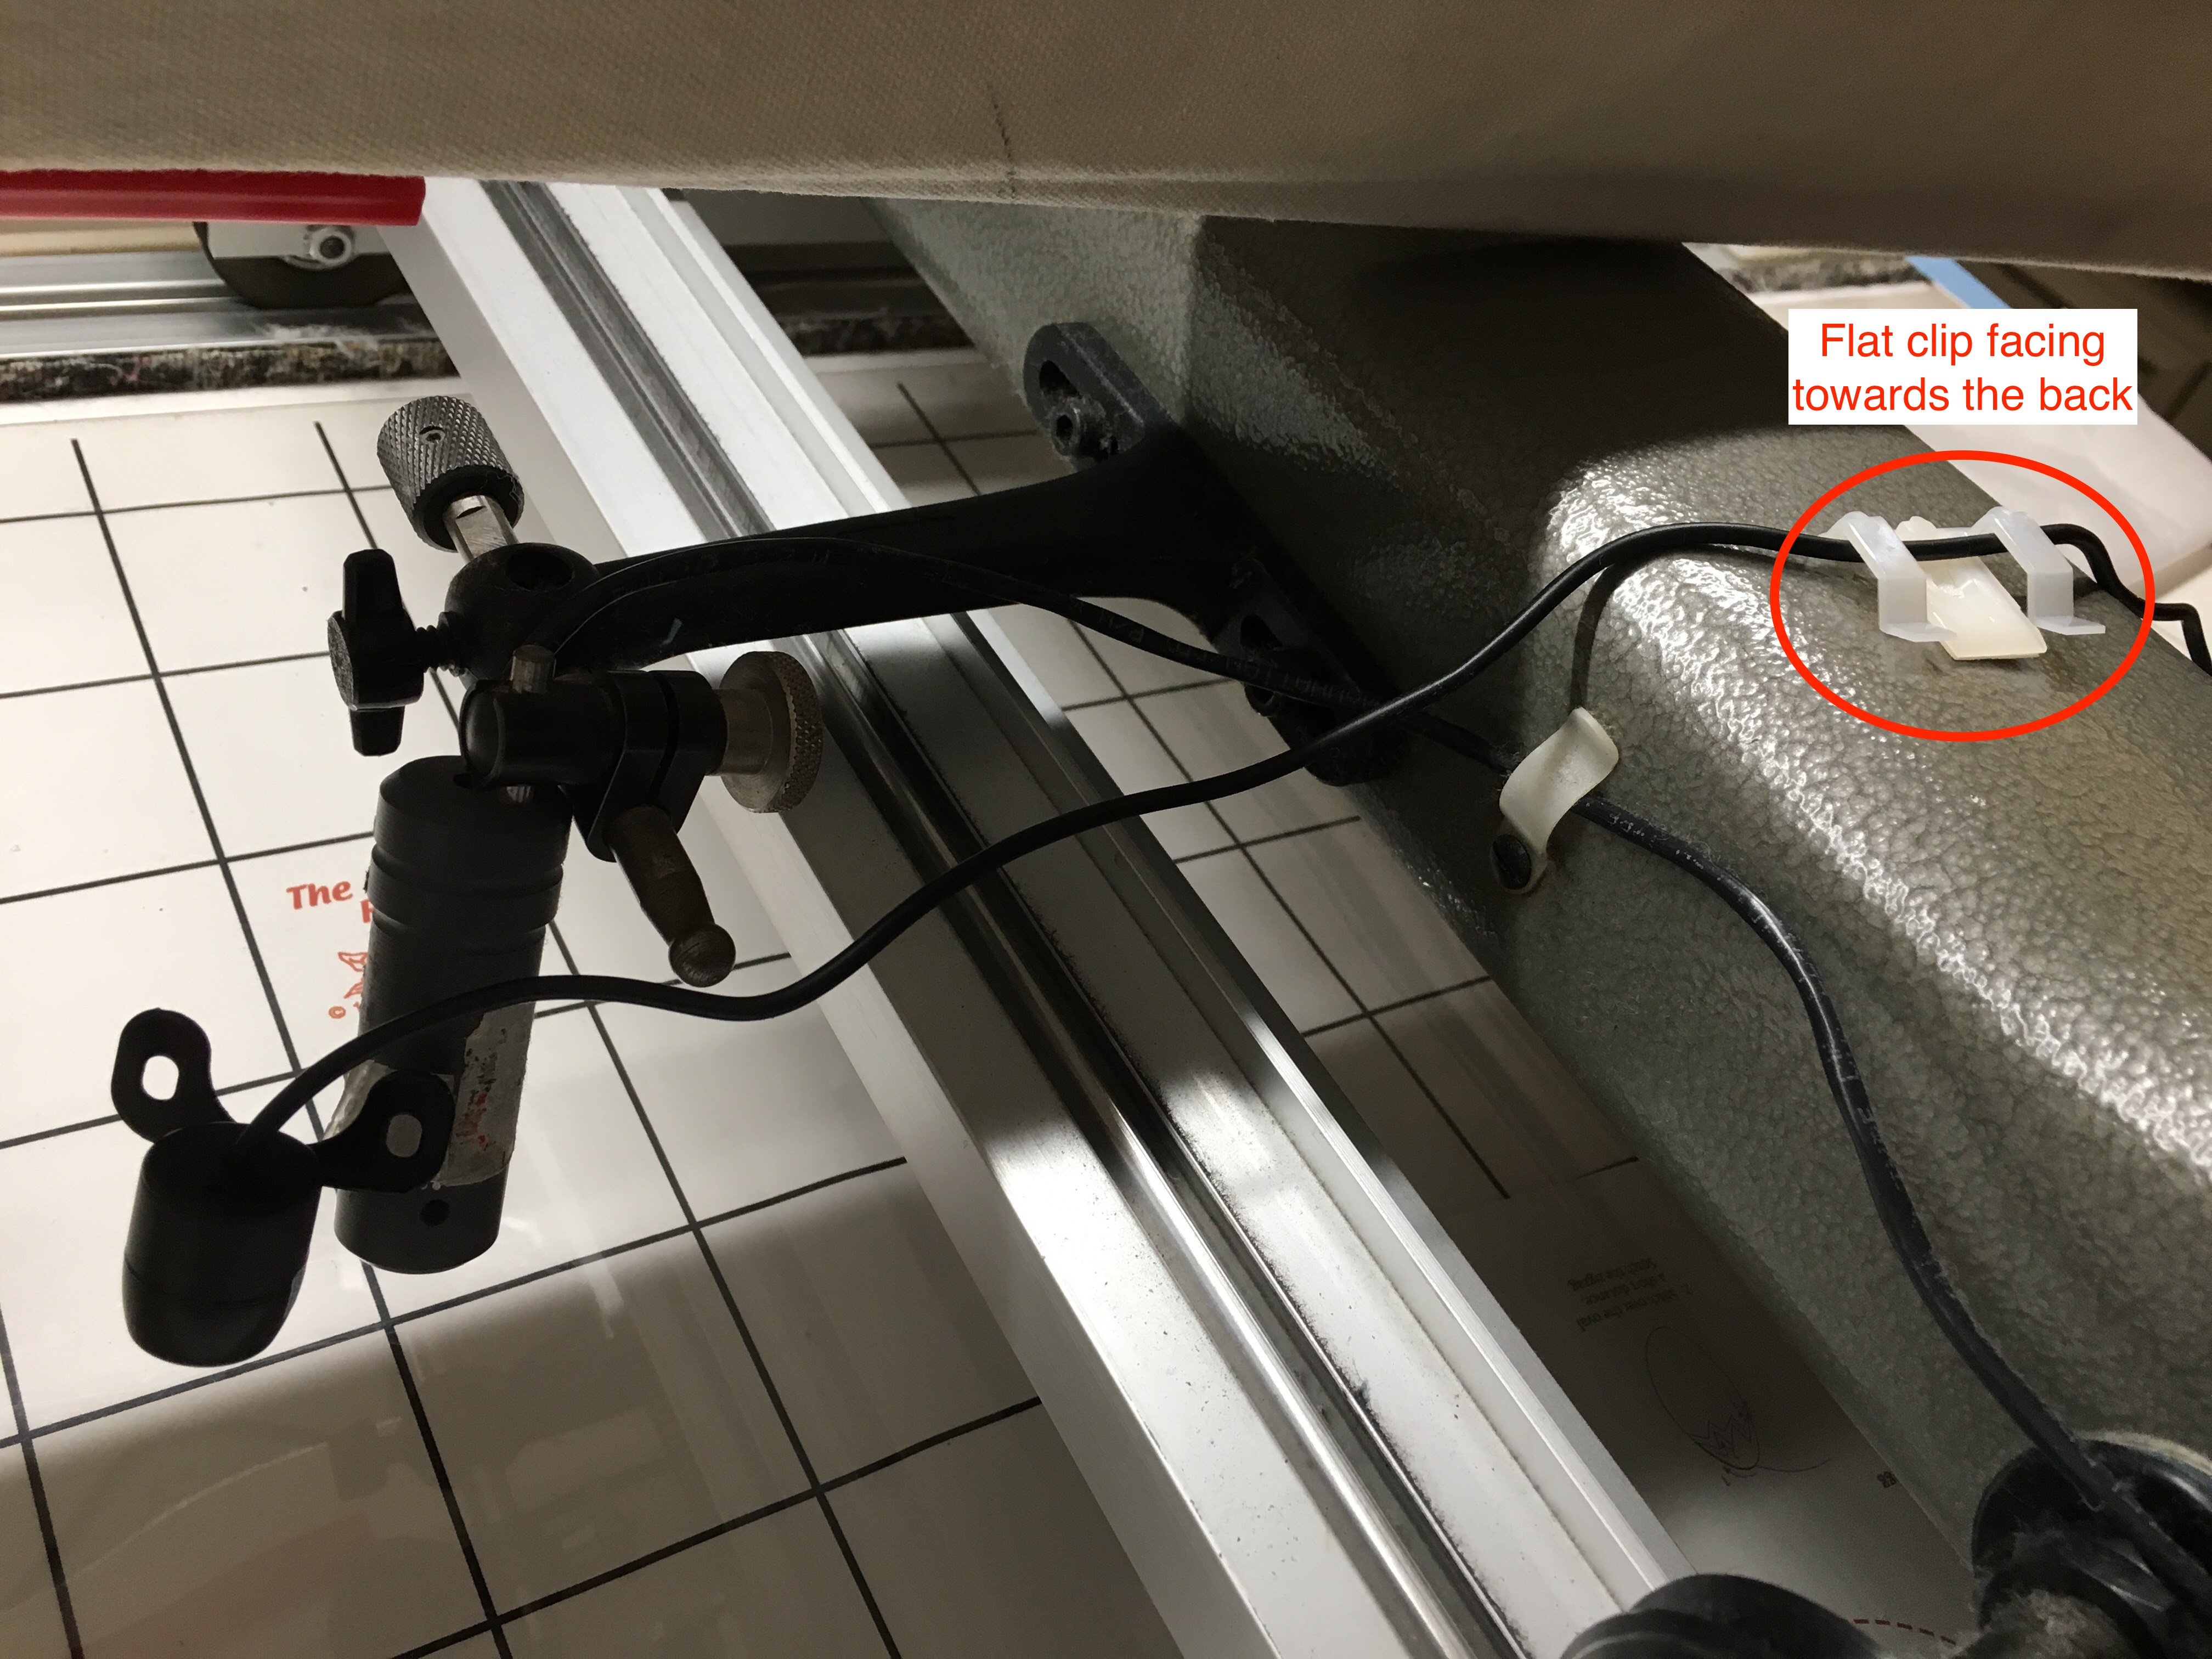
- Depending on the size of your quilting machine you may have some wire “slack.” If so, attach the included large clip towards the back of your machine to coil up and secure any excess wiring (see photo).
-
-
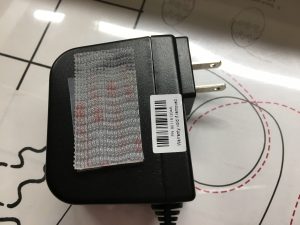
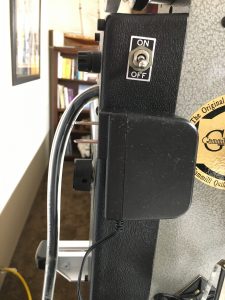
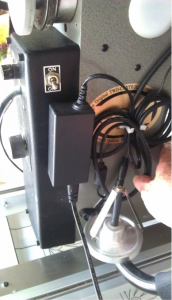
- Find the power source in the box. Locate where you would like to place it on your longarm (on the back side, towards the back, etc.). Place one strip of dual lock vertically onto the power source. Then place a second strip of dual lock onto the strip you’ve already placed, locking it in. Peel the backing and press the power source firmly onto the longarm. **You will need to provide your own extension cord with a length long enough to accommodate the movement of your machine.
-
-
-
- Take the cable coming from the power source and push it into the matching cable end coming from your monitor.
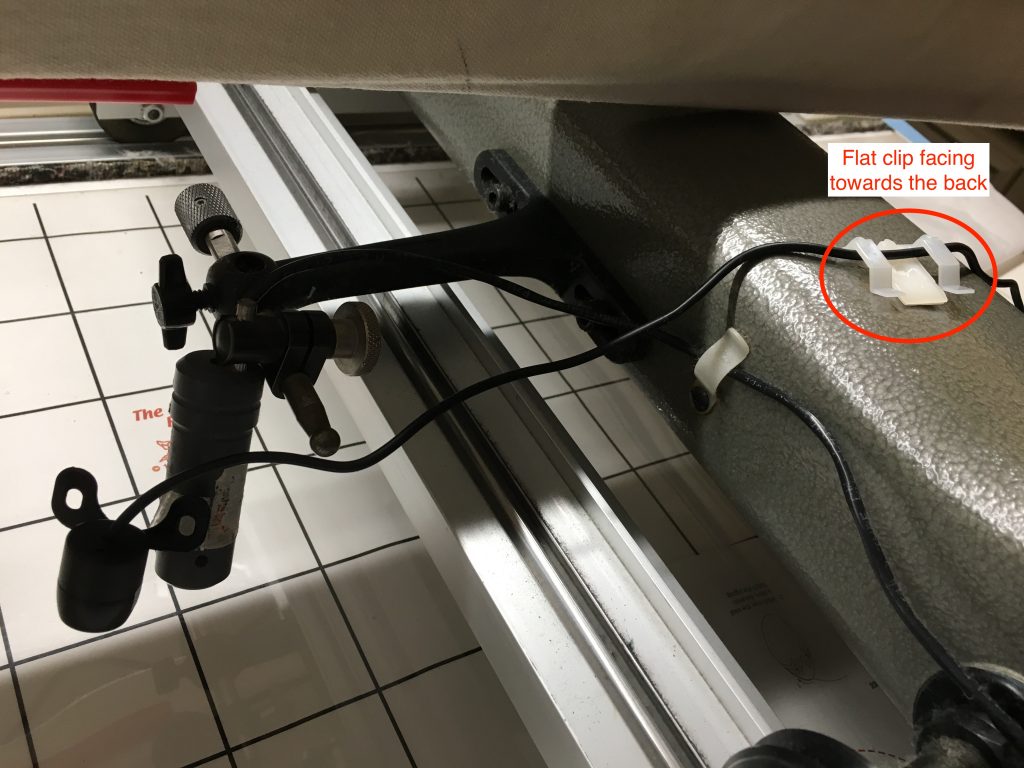
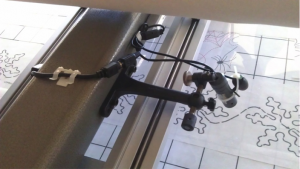
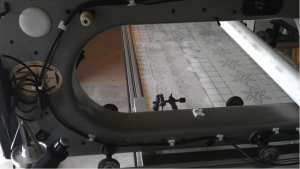
- If you purchased A Quilter’s Eye 2 take the extra cable with the white tie and extend it under or over (pictures below) the bottom arm of your longarm (I prefer under so I don’t cause any “drag” when quilting). Take your remaining piece of Dual Lock and cut it in half into 2 small squares. Apply one piece to your new panto camera and the other piece to your laser light on your longarm securing them together. Point the panto camera in the direction of your pantograft pattern. If the orientation is not correct (going in the proper direction that you quilt) simply rotate the camera on the bracket). If you prefer, you can secure the camera to the laser light on your longarm using a zip tie. Using the clip secure the cable under or over the bottom arm of your longarm with the opening of the clip facing towards the back. Wind excess cabling where previous cabling is already secured.
-
Using A Quilter’s Eye:
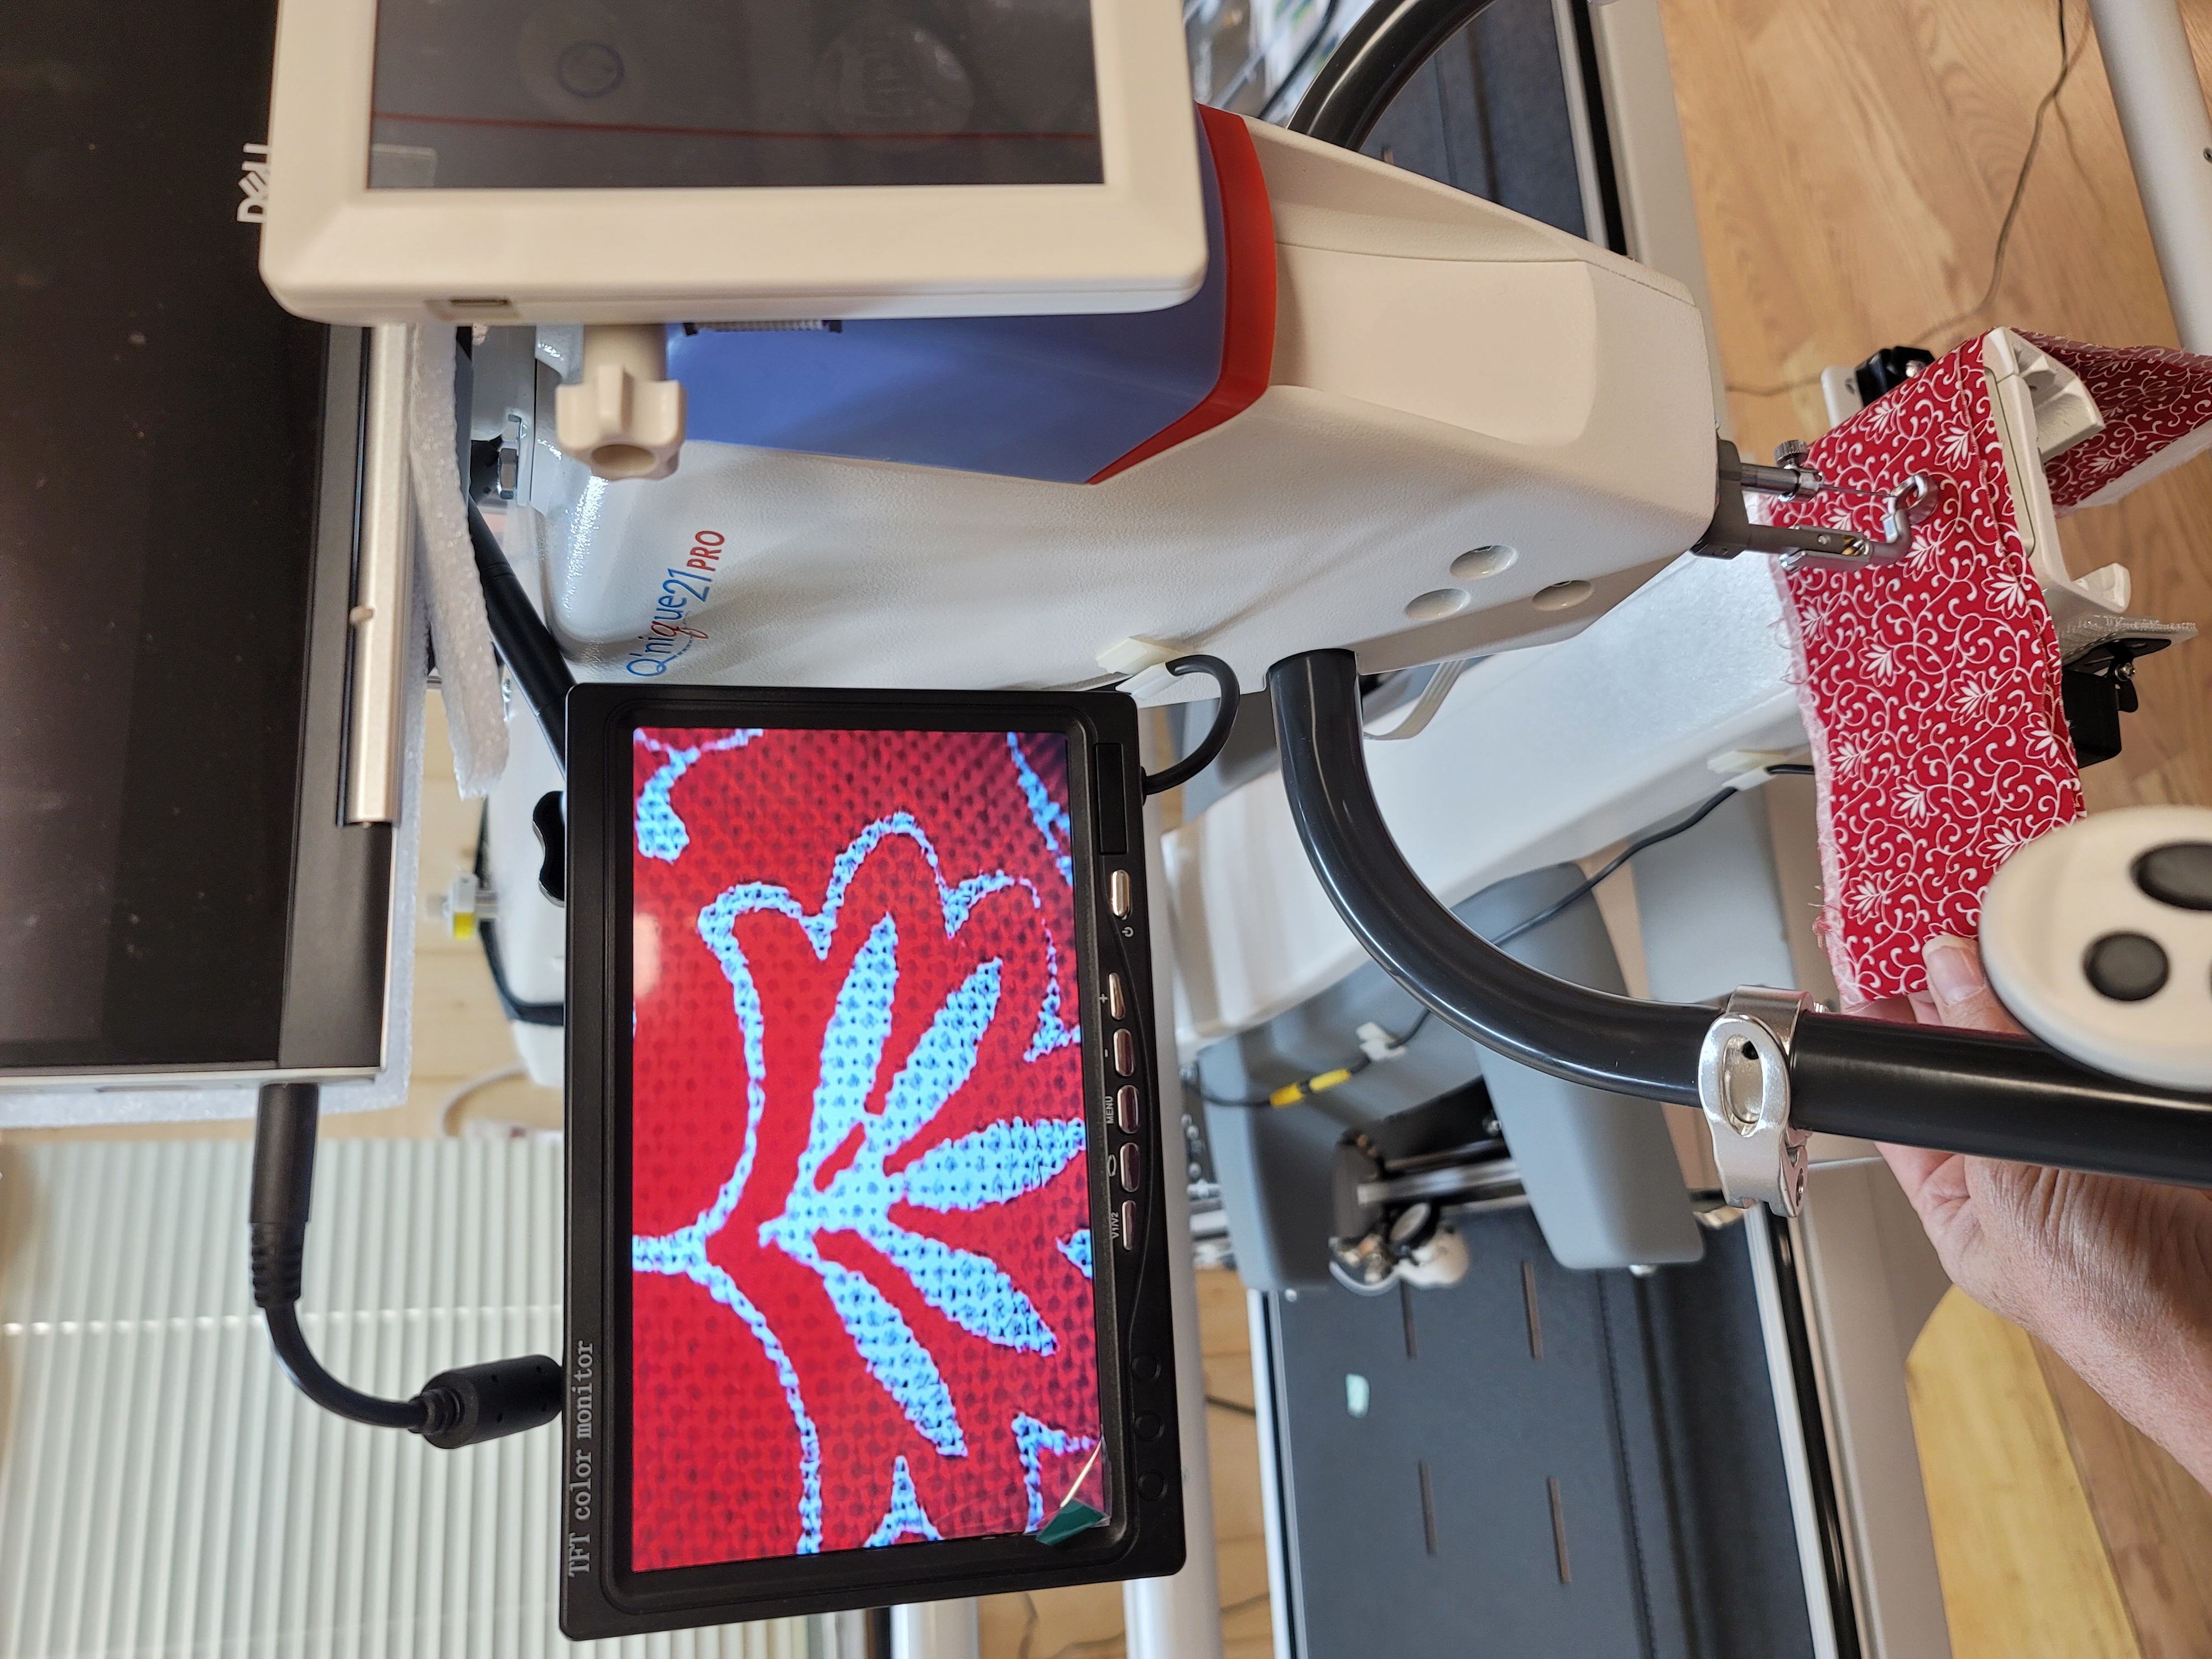
- Push the lower right button on the monitor to turn A Quilter’s Eye on. At first you will see some symbols – they will disappear. If the screen is blue with no picture, press V1/V2 button to change camera displays. The V1 screen is what shows the stitching under the quilt, and the V2 screen shows the pantograph pattern if the “panto” camera was also purchased.
- The stitch camera comes to you already focused at 1 inch from the top of the camera to the quilt back, which is the best. ***Please don’t randomly twist the camera disk. If the stitches are not clear, the view from the camera can be altered by turning the black disk in the center of the camera in small increments counter-clock wise for a closer view and clock wise for a wider view. In the center of the camera top is a tiny hole which is the lens – DO NOT TOUCH. On the outside of the lens are two tiny holes. Using a bent paperclip or Tpin, insert in one of the two holes and slightly turn the camera for focus to your longarm.
- If you need to (and before trying to refocus) you can move the camera unit up/down or front/back along the strip of Dual Lock per your preference. Keep in mind that there must be at least 25% of the camera base attached to the Dual Lock to keep the camera securely in place.
If you ordered the dual unit with the “panto” camera, turn on your laser to show where the light is on your pantograph pattern. Attach the “panto” camera to your laser light or machine wall and position it so it shows your laser light on the monitor. Occasionally the “panto” camera isn’t orientated correctly – meaning the view on the monitor screen isn’t going in the correct direction (ie, you are moving from left to right, but the monitor shows movement from right to left). To adjust, slightly twist the 2 halves of the camera open and move the bracket in small increments until the direction is correct. Then tighten the 2 halves.
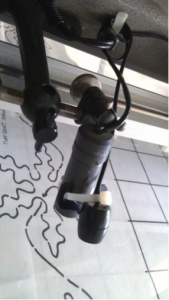
The cable can go over the top of the lower arm secured by a clip or if your machine allows under the lower arm. Face the clip with the opening towards the back of your machine to secure the wire. Attach camera to the cable.
-
-
- Push the V2 button on the monitor screen and adjust the angle and position of the camera so that your view is following the laser light.
-
Remember – the view of the stitching on the back of a quilt is on the V1 screen, and the view of the pantograph is on the V2 screen changed by simply pushing the button on the front of the monitor.
Only the on/off and V1/V2 buttons need to be pushed. The menu, – and + buttons have no function on our monitor and don’t need to be pushed at all.
If you don’t feel that the camera is focused well, you may want to try the following:
-
-
- Load a previously quilted quilt or sample quilt on your machine preferably quilted with a colored thread not matching the fabric.
- Attach the camera as directed above.
- Make sure the camera lens is clean gently using the QTip on the pinhole lens.
- If focus needs to be changed, pull the camera away while still connected to the cable. Point it towards any stitching (even the top of the quilt) the same distance from the fabric as it would be if the camera was mounted to the machine. Remember, we send the camera already focused to 1″ from the top of the camera to the back of the quilt. If possible, mount your dual lock so that the camera rests in that position before trying to refocus.
- If further help is needed, please email us at: aquilterseye@gmail.com or phone 866-439-1119
-
Additional pictures of viewing the stitching on the back, applications of A Quilter’s Eye on different machines, etc., are shown on our website under the heading Photo Gallery. These pictures have not been altered or changed in any way.
-
-
- (


Previous Version of a Quilter’s Eye
INSTALLATION INSTRUCTIONS FOR PREVIOUS EDITION OF A QUILTER’S EYE
A QUILTER’S EYE (PREVIOUS EDITION) INSTALLATION MANUAL
Included in the box: 7” LCD monitor screen with mounting bracket installed and necessary cable, stitch camera w/mounting bracket, heavy duty power supply with cord, package of clips and supplies to attach unit, and “pantograph” camera (if ordered as dual unit).
Installation directions:
- Look at your quilting machine and determine where you desire to mount A Quilter’s Eye (i.e., top front/top back, left side). The monitor can swivel on the base if you need to change the view from the front of your machine to the back.
- Use the alcohol wipes to clean the surface of your quilting machine where the monitor, camera and clips are to be installed to remove any oils and surface dust. Let the area dry.
The dual lock strips we have included have a strong adhesive and can possibly remove machine paint if they need to be moved once adhered. Before removing adhesive backing to apply the strips, we recommend experimenting with placement and then marking where you desire the strips to be.
- First, install the monitor and connect the camera and power supply as follows:
- Peel away the sticky back from 2 strips of the dual lock. Adhere them at least one inch apart on the bottom of the monitor base as shown.

- Press 2 more strips of the dual lock to those you have already applied, peel away the backing and then firmly press the monitor in place on the clean surface of your quilting machine.
- Notice the tiny paper tab in the corner of the monitor. Holding the monitor base down with one hand carefully pull the tab upward and across to remove the monitor screen protector. The screen can be tilted to your preference by loosening the thumb screw on the left back. Tilt the screen to your best view and tighten.
- Take the coiled wire and push the end with the white dot into the connector at the back of the monitor aligning the dots (see photo). Gently place the wiring over the machine to the left side and let it rest on your machine or machine table so that its weight isn’t hanging down towards the floor.
- The power source “box” has a strip of Dual Lock already in place on the back. Peel off the film of the matching piece and push the power source securely on the left side of your machine near the back (see photo). You will need to provide your own extension cord with a length long enough to accommodate the movement of your machine.
- Take the wire coming from the power source with the “round” end and push it into the “like” end of the black wire coming from your monitor.
- Take the camera segment and push the end with the connector into the end of the gray monitor wire carefully aligning the small pins inside. We have put a white dot on each end to assist you in aligning them as the pins can be easily bent.
IMPORTANT: Be sure to place the clips and wires out of the way of any moving machine parts or moving thread!
- Before peeling off the back, place one of the larger flat clips on the two monitor wires just a couple of inches from where the wires come from the back of the monitor . You can now slide the clip up/down the wire to find a flat space on your machine (see photo suggestion).
- Peel off the paper back and secure the clip with the wires to your machine. Sometimes the paper backing is difficult to remove. We recommend sliding a straight pin or bent paper clip just underneath the paper to start the peeling.
- Starting several inches from the flat clip and before peeling off the paper backing, put a few small clips on the wires and slide them every 5 to 7 inches apart along the upper left side of your quilting machine heading to the back. Peel off the thin layer of paper on each clip and secure to machine. Continue adding and securing clips down the side and now moving forward to the front of your quilting machine (see photos).

- At the very front of your machine add a piece of Dual Lock horizontally on the outside wall next to the bobbin case as low as your machine wall will allow because the view is so magnified from the camera (see photo).
- Press the camera bracket into the Dual Lock. *Be sure to place a small clip on each side of the camera/wire connection (see photo above).
- Depending on the size of your quilting machine you may have some wire “slack.” If so, attach the included large clip towards the back of your machine to coil up and secure any excess wiring (see photo).
- Add cord to the power source and plug into your wall or, if needed, into an extension cord for extra length.
Using A Quilter’s Eye:
- Push the lower right button on the monitor to turn A Quilter’s Eye on. If the screen is blue with no picture, press V1/V2 button to change camera displays. The V1 screen is what shows the stitching under the quilt, and the V2 screen shows the pantograph pattern if the “panto” camera was also purchased.
- The stitch camera comes to you already focused at 1 ½ inches from the top of the camera to the quilt back. If the stitches are not clear, the view from the camera can be altered by turning the black disk in the center of the camera in small increments counter-clock wise for a closer view and clock wise for a wider view. In the center of the camera top is a tiny hole which is the lens – DO NOT TOUCH. On the outside of the lens are two tiny holes. Using a bent paperclip or Tpin, insert in one of the two holes and slightly turn the camera for focus to your longarm.
- You can move the camera unit up/down or front/back along the strip of Dual Lock per your preference. Keep in mind that there must be at least 25% of the camera base attached to the Dual Lock to keep the camera securely in place.
- If the quilting arm on your machine is longer than 28” you will need us to provide you with a “Y” connector to add the extra wire length needed along the bottom.
If you ordered the dual unit with the “panto” camera, turn on your laser to show where the light is on your pantograph pattern. Attach the “panto” camera to your laser light or machine wall and position it so it shows your laser light on the monitor. Occasionally the “panto” camera isn’t orientated correctly – meaning the view on the monitor screen isn’t going in the correct direction (ie, you are moving from left to right, but the monitor shows movement from right to left). To adjust, slightly rotate the bracket between the two halves of the “panto” camera until the orientation is correct.
*Handy tip from a fellow user: If you are having trouble seeing the light from your laser camera on the pantograph pattern, try placing a colored (ie, green, or red) clear Saran Wrap over the pantograph pattern.
The cable can go over the top of the lower arm secured by a flat clip or if your machine allows under the lower arm. Face the clip with the opening towards the back of your machine to secure the wire. Attach camera to the cable.
- Push the V2 button on the monitor screen and adjust the angle and position of the camera so that your view is following the laser light. Remember, if needed, you can slightly unscrew the laser light for the correct orientation.
Remember – the view of the stitching on the back of a quilt is on the V1 screen, and the view of the pantograph is on the V2 screen changed by simply pushing the button on the front of the monitor.
If you don’t feel that the camera is focused well, you may want to try the following:
- Load a previously quilted quilt or sample quilt on your machine.
- Attach the camera as directed above.
- Make sure the camera lens is clean gently using the QTip on the pinhole lens.
- If focus needs to be changed, pull the camera away while still connected to the cable. Point it towards any stitching (even the top of the quilt) the same distance from the fabric as it would be if the camera was mounted to the machine. Remember, we send the camera already focused to 1 1/2″ from the top of the camera to the back of the quilt. If possible, mount your dual lock so that the camera rests in that position before trying to refocus.
- If further help is needed, please email us at: aquilterseye@gmail.com or phone 866-439-1119
Additional pictures of viewing the stitching on the back, applications of A Quilter’s Eye on different machines, etc., are shown on our website under the heading Photo Gallery. These pictures have not been altered or changed in any way.
Thank you for your purchase of A Quilter’s Eye. Enjoy and Happy Quilting!
Optional Brackets for Installation
Many longarms are able to use A Quilter’s Eye as it is delivered. If the top space on your longarm is limited we have options.
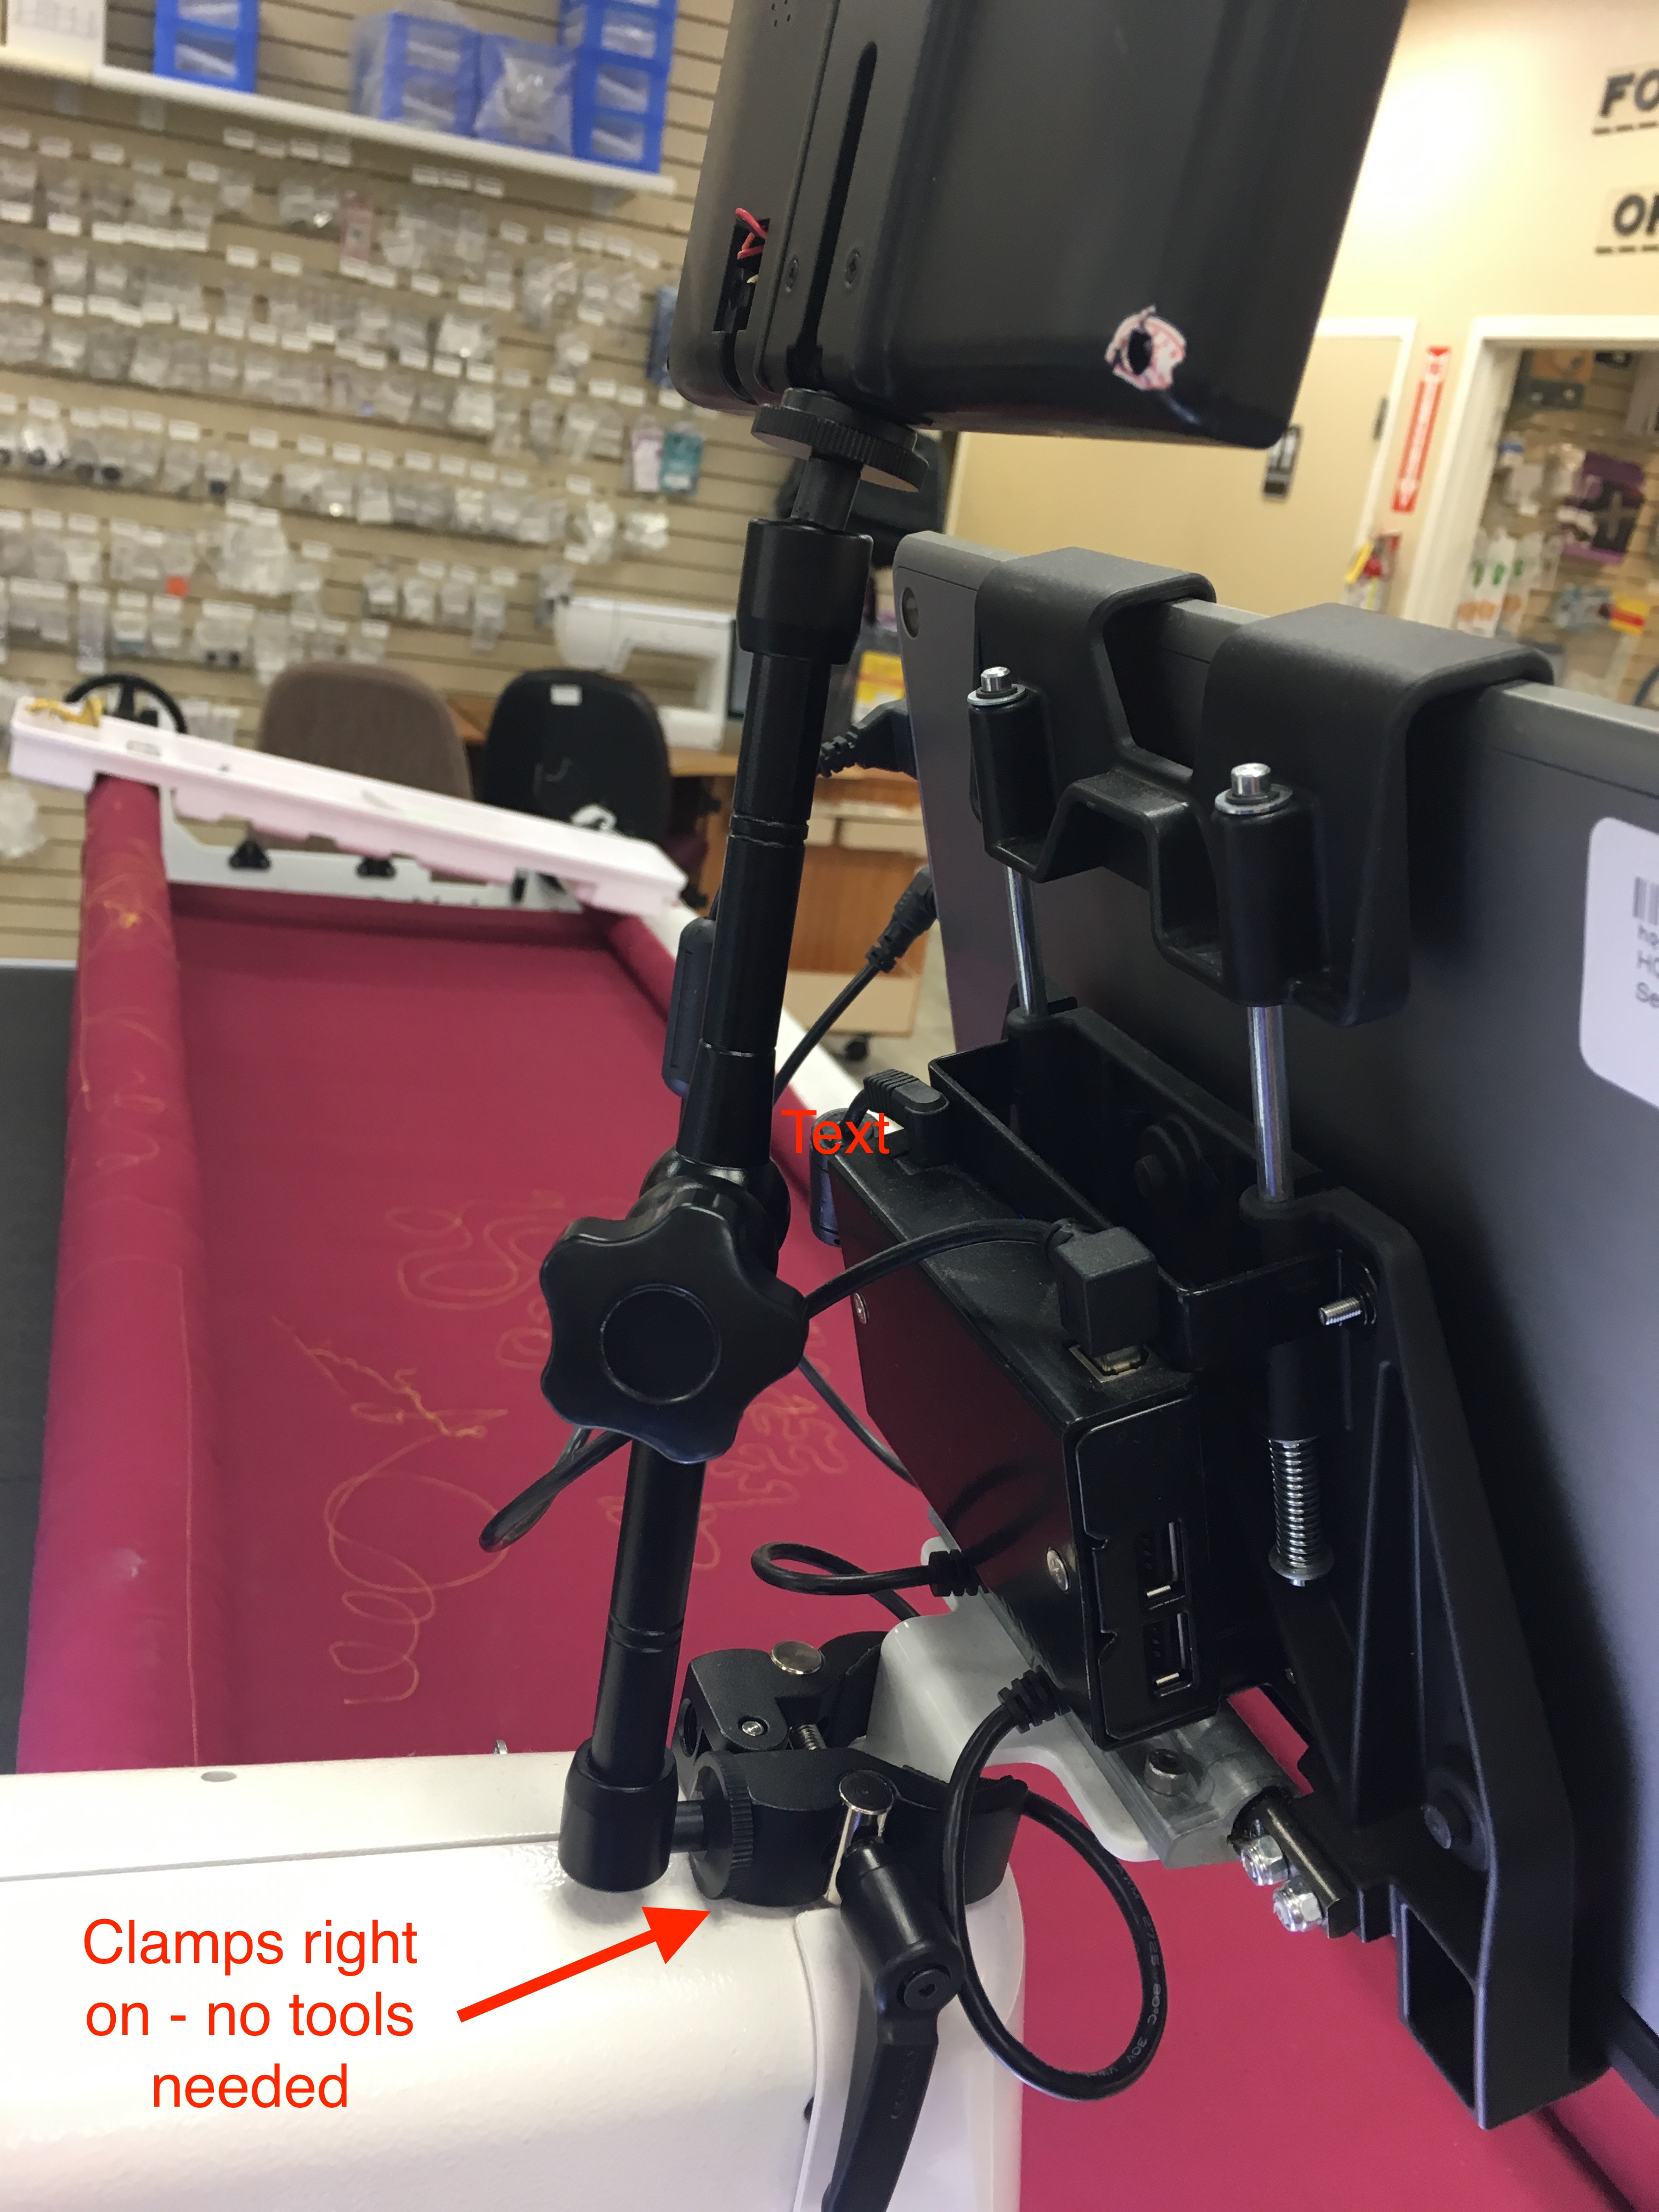
If you have a large tablet in front, our most popular option is our extended monitor arm which clamps directly to your longarm with no tools (shown here on a HandiQuilter Amara) and can be moved as shown below in the pictures.
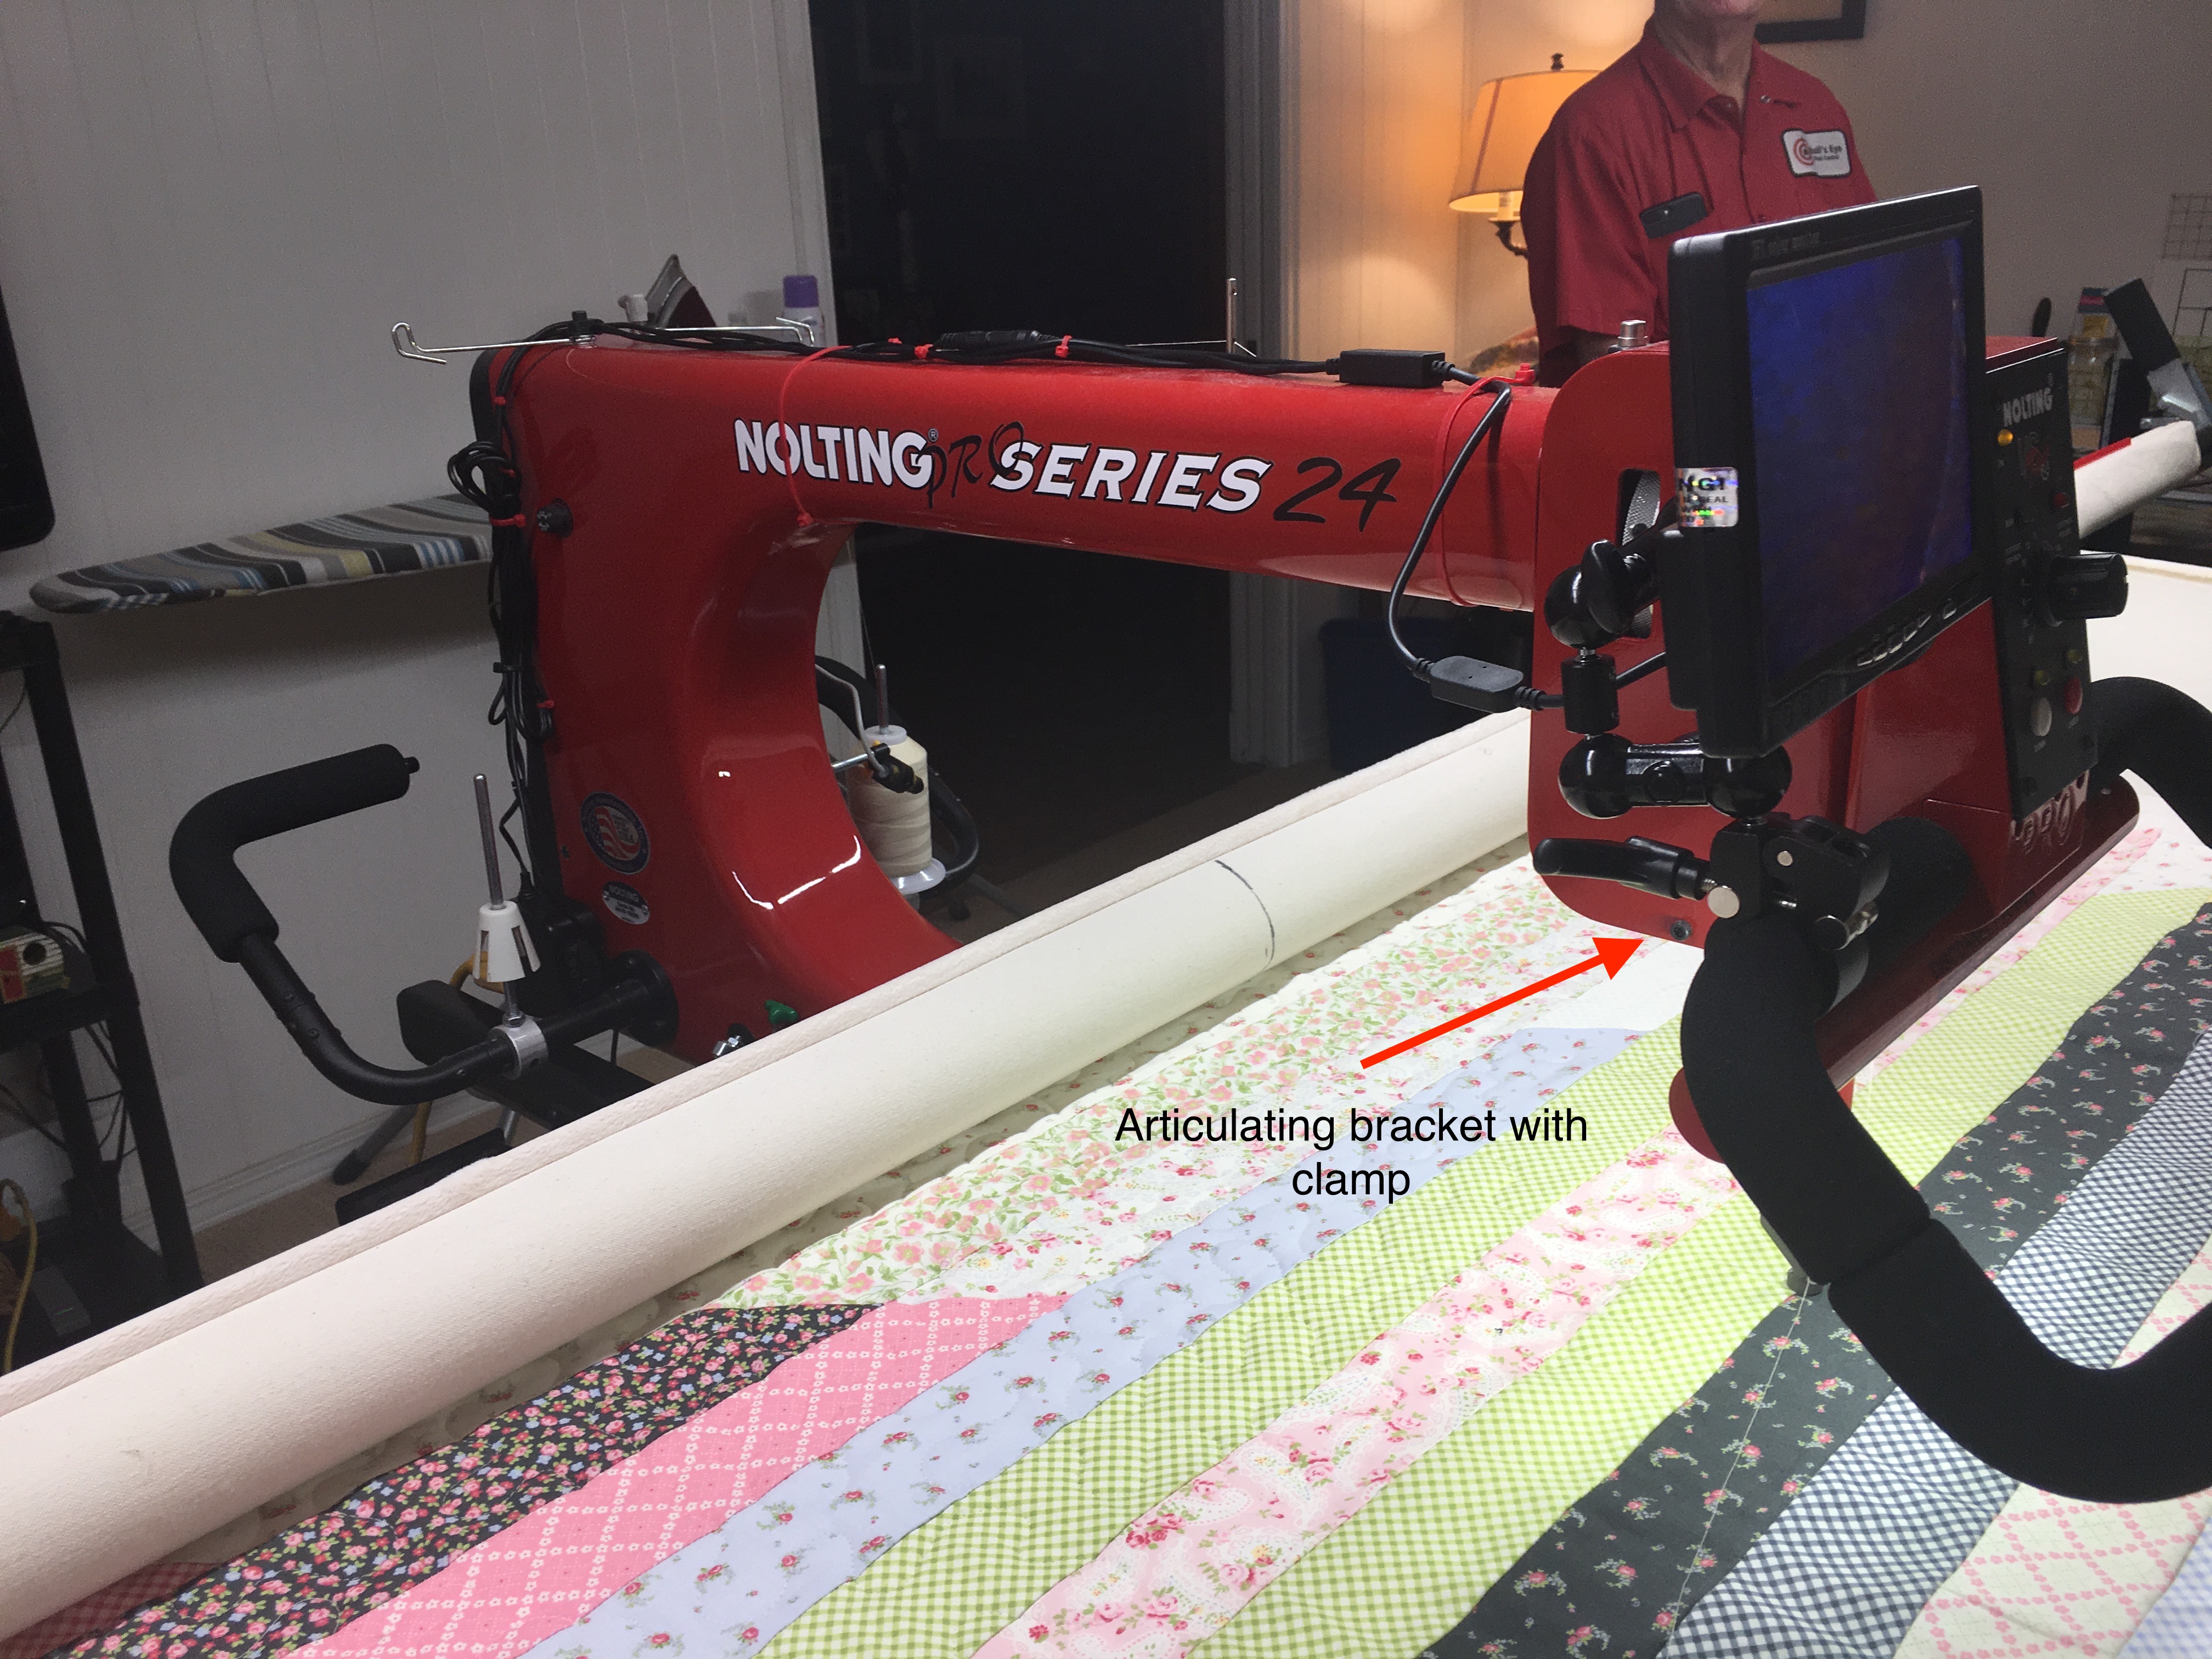
Another option for a bracket if needed would be our articulating arm and clamp.
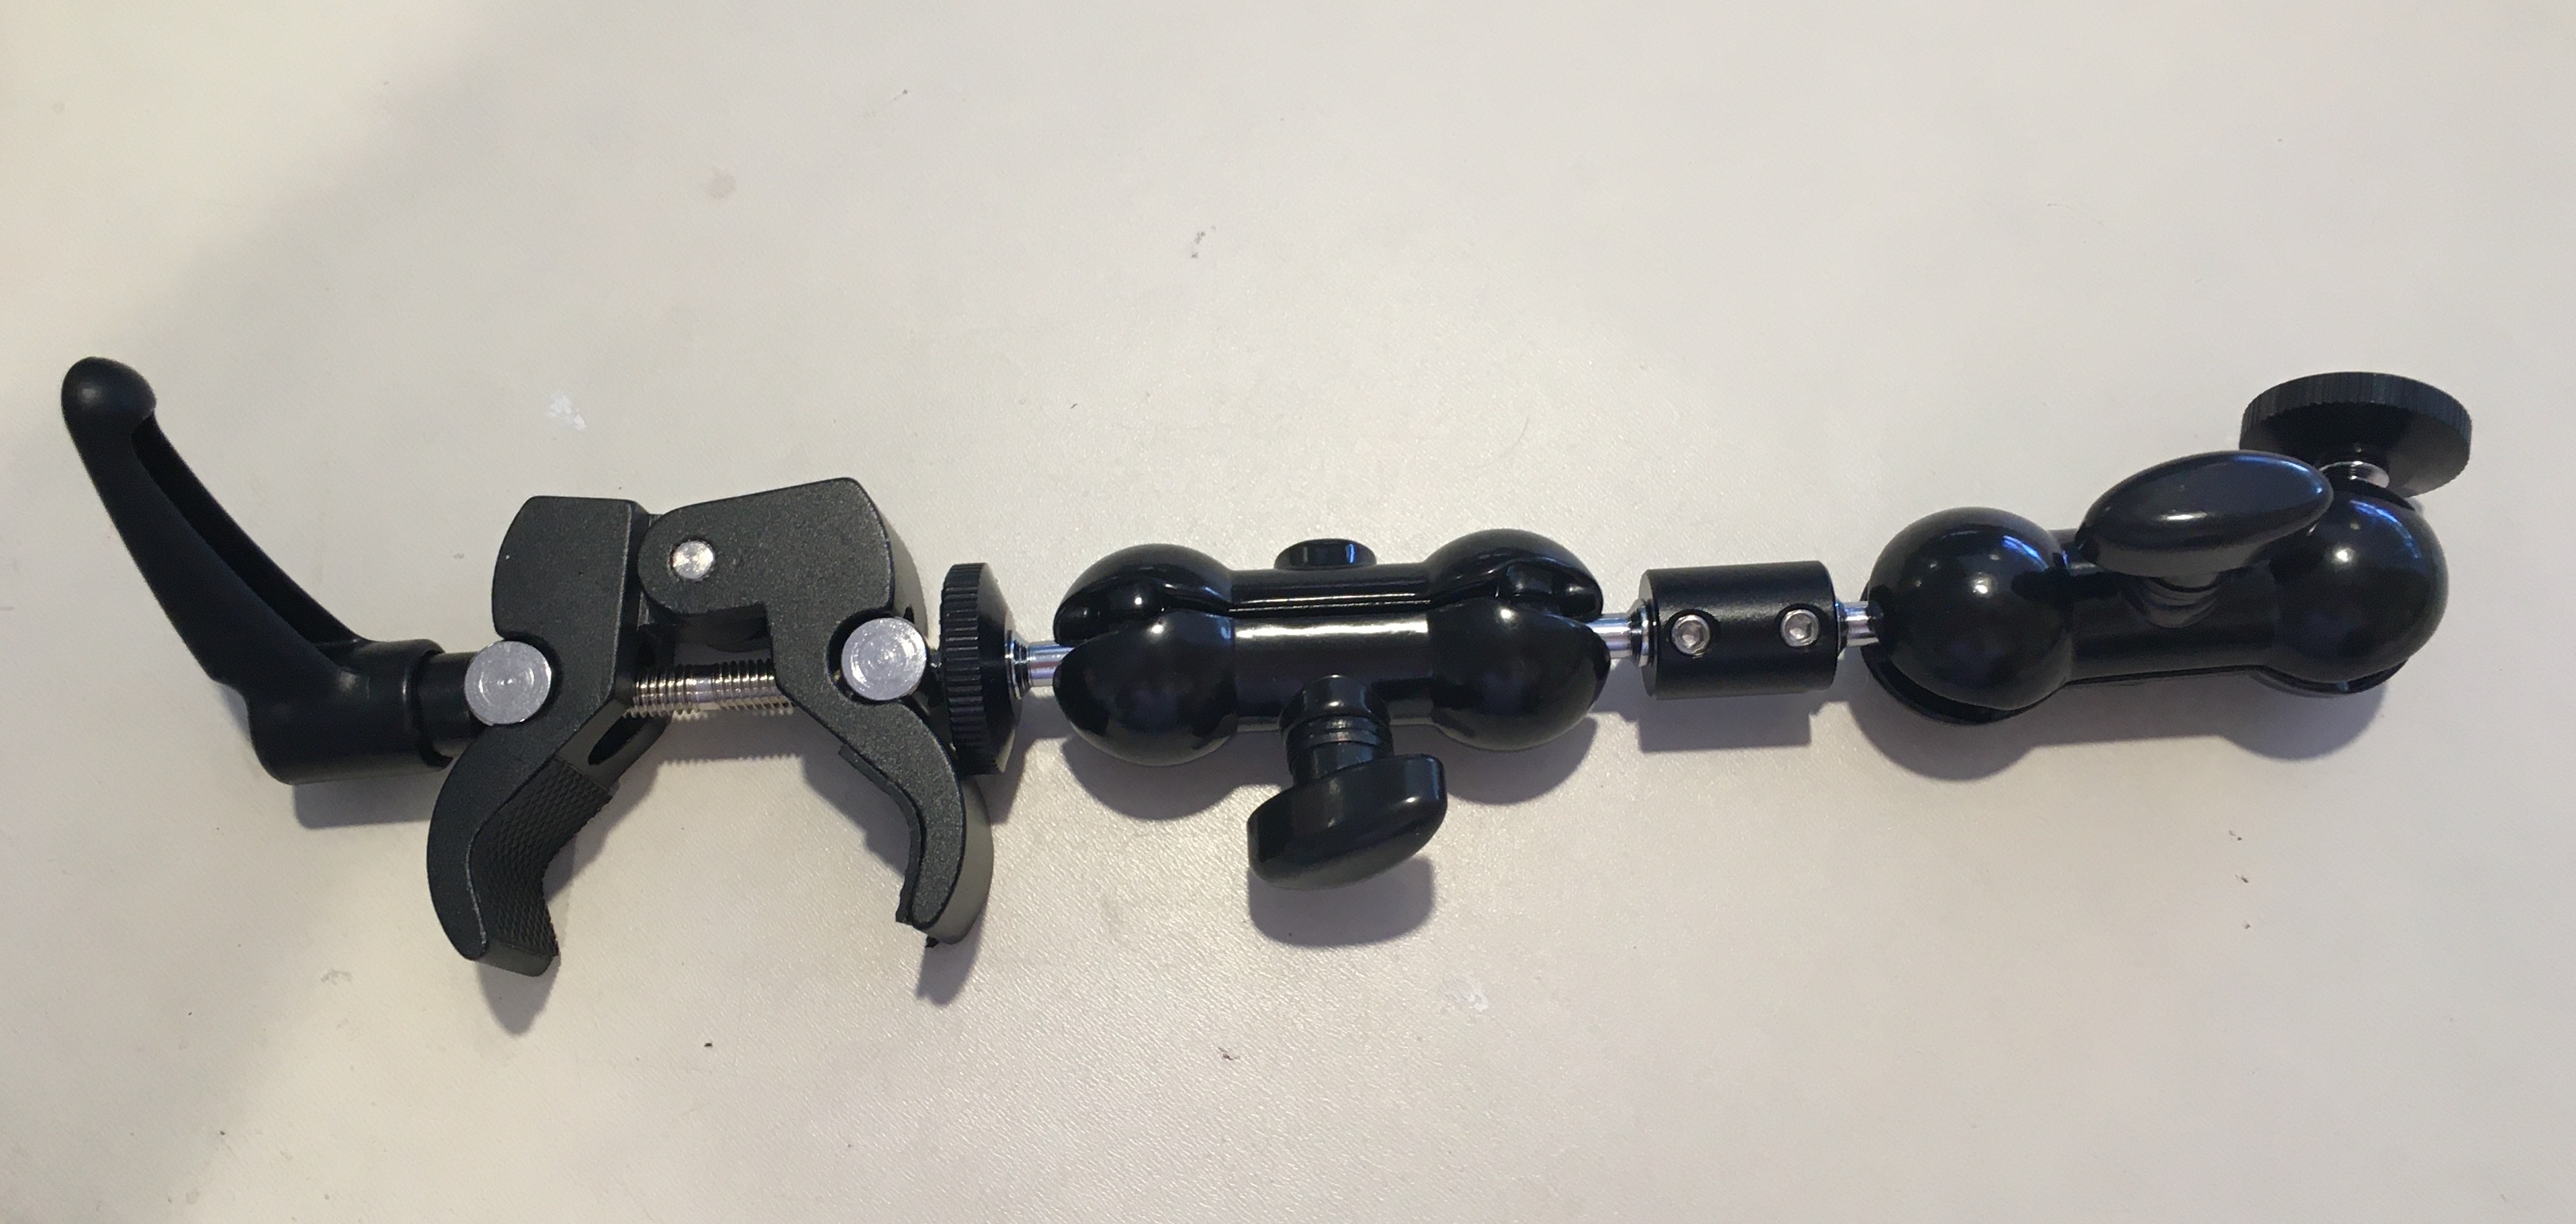
This can be installed in two different ways.
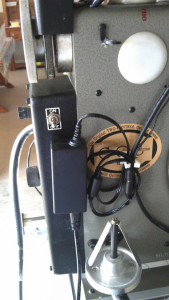
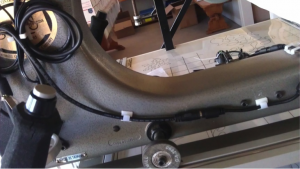
One way is with the clamp, you can attach it to your left handlebar and move and swivel the monitor any which way (shown here on a Nolting).
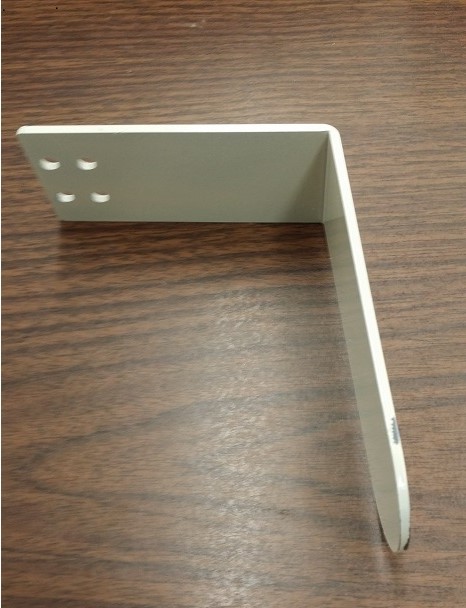
The second option would be to use the bracket without the clamp if you have a place on your longarm that the bracket can be directly screwed onto (shown here on a Nolting).

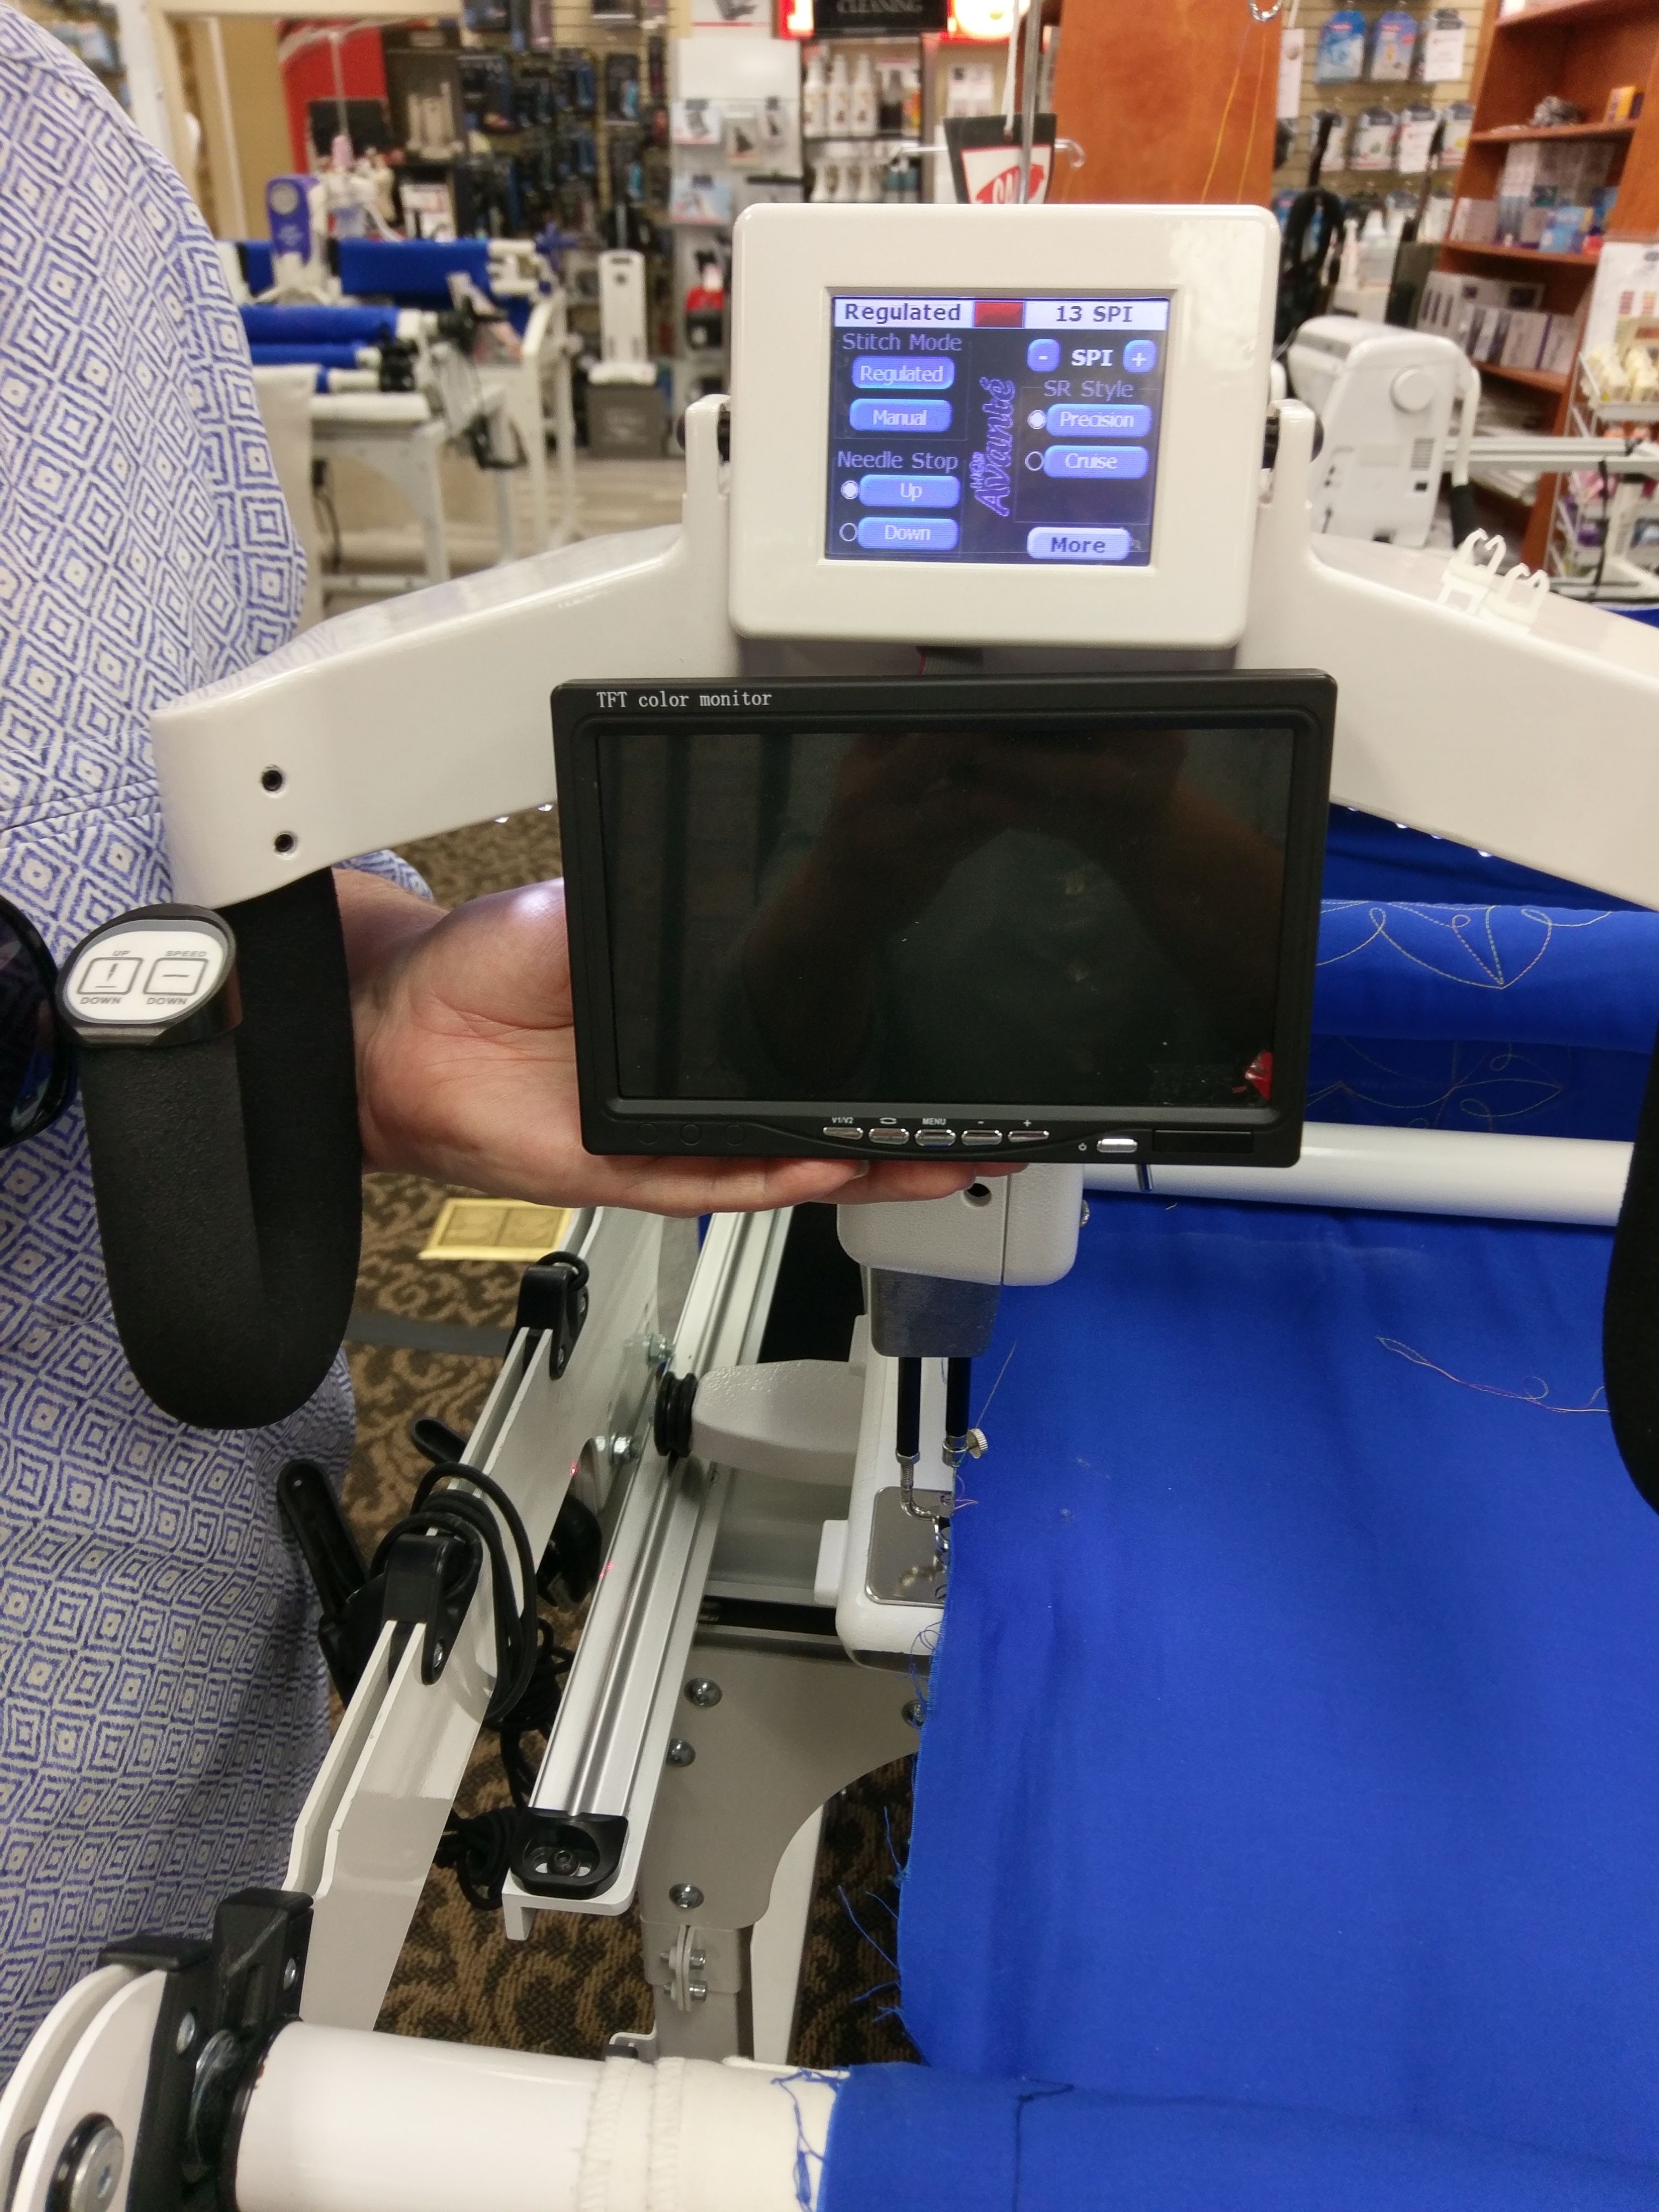
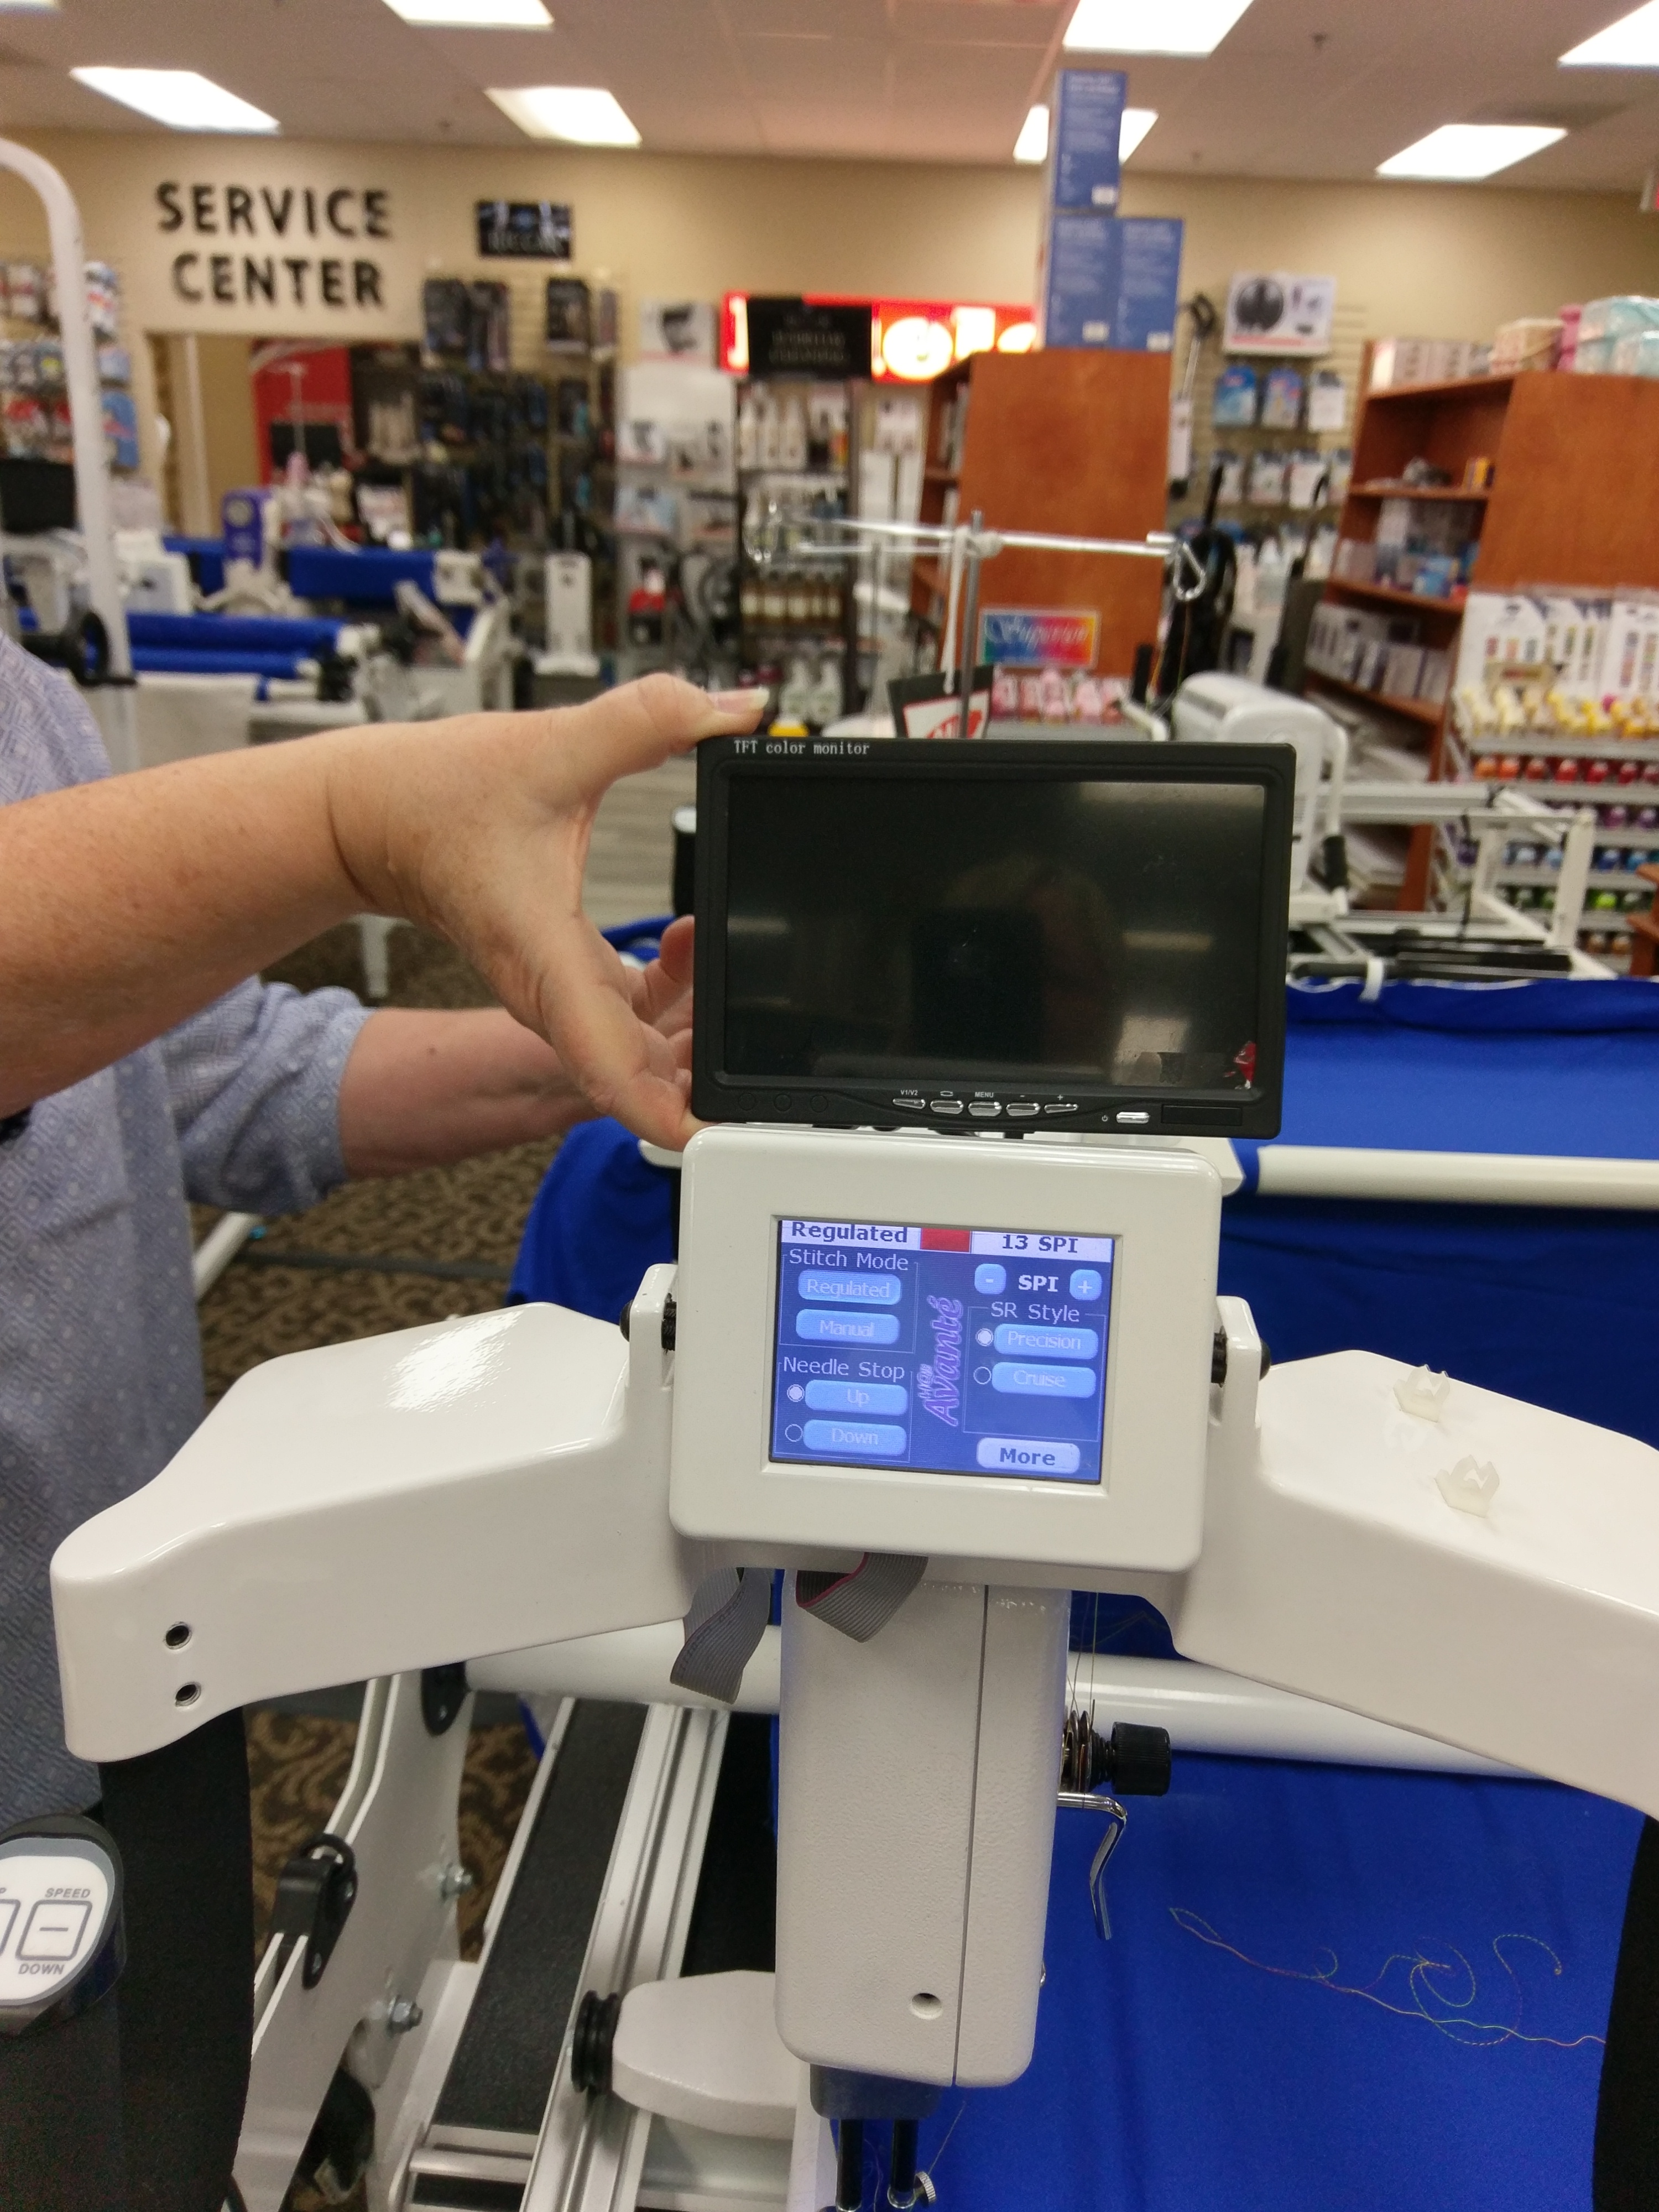
For HandiQuilter users (except the Amara), this bracket puts the view of the stitching directly in front of you between the handlebars or above your Pro Stitcher and is easily installed with no tools. This will not work on the Amara longarm.
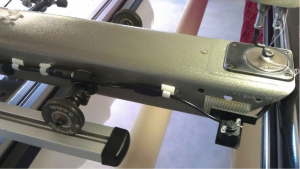
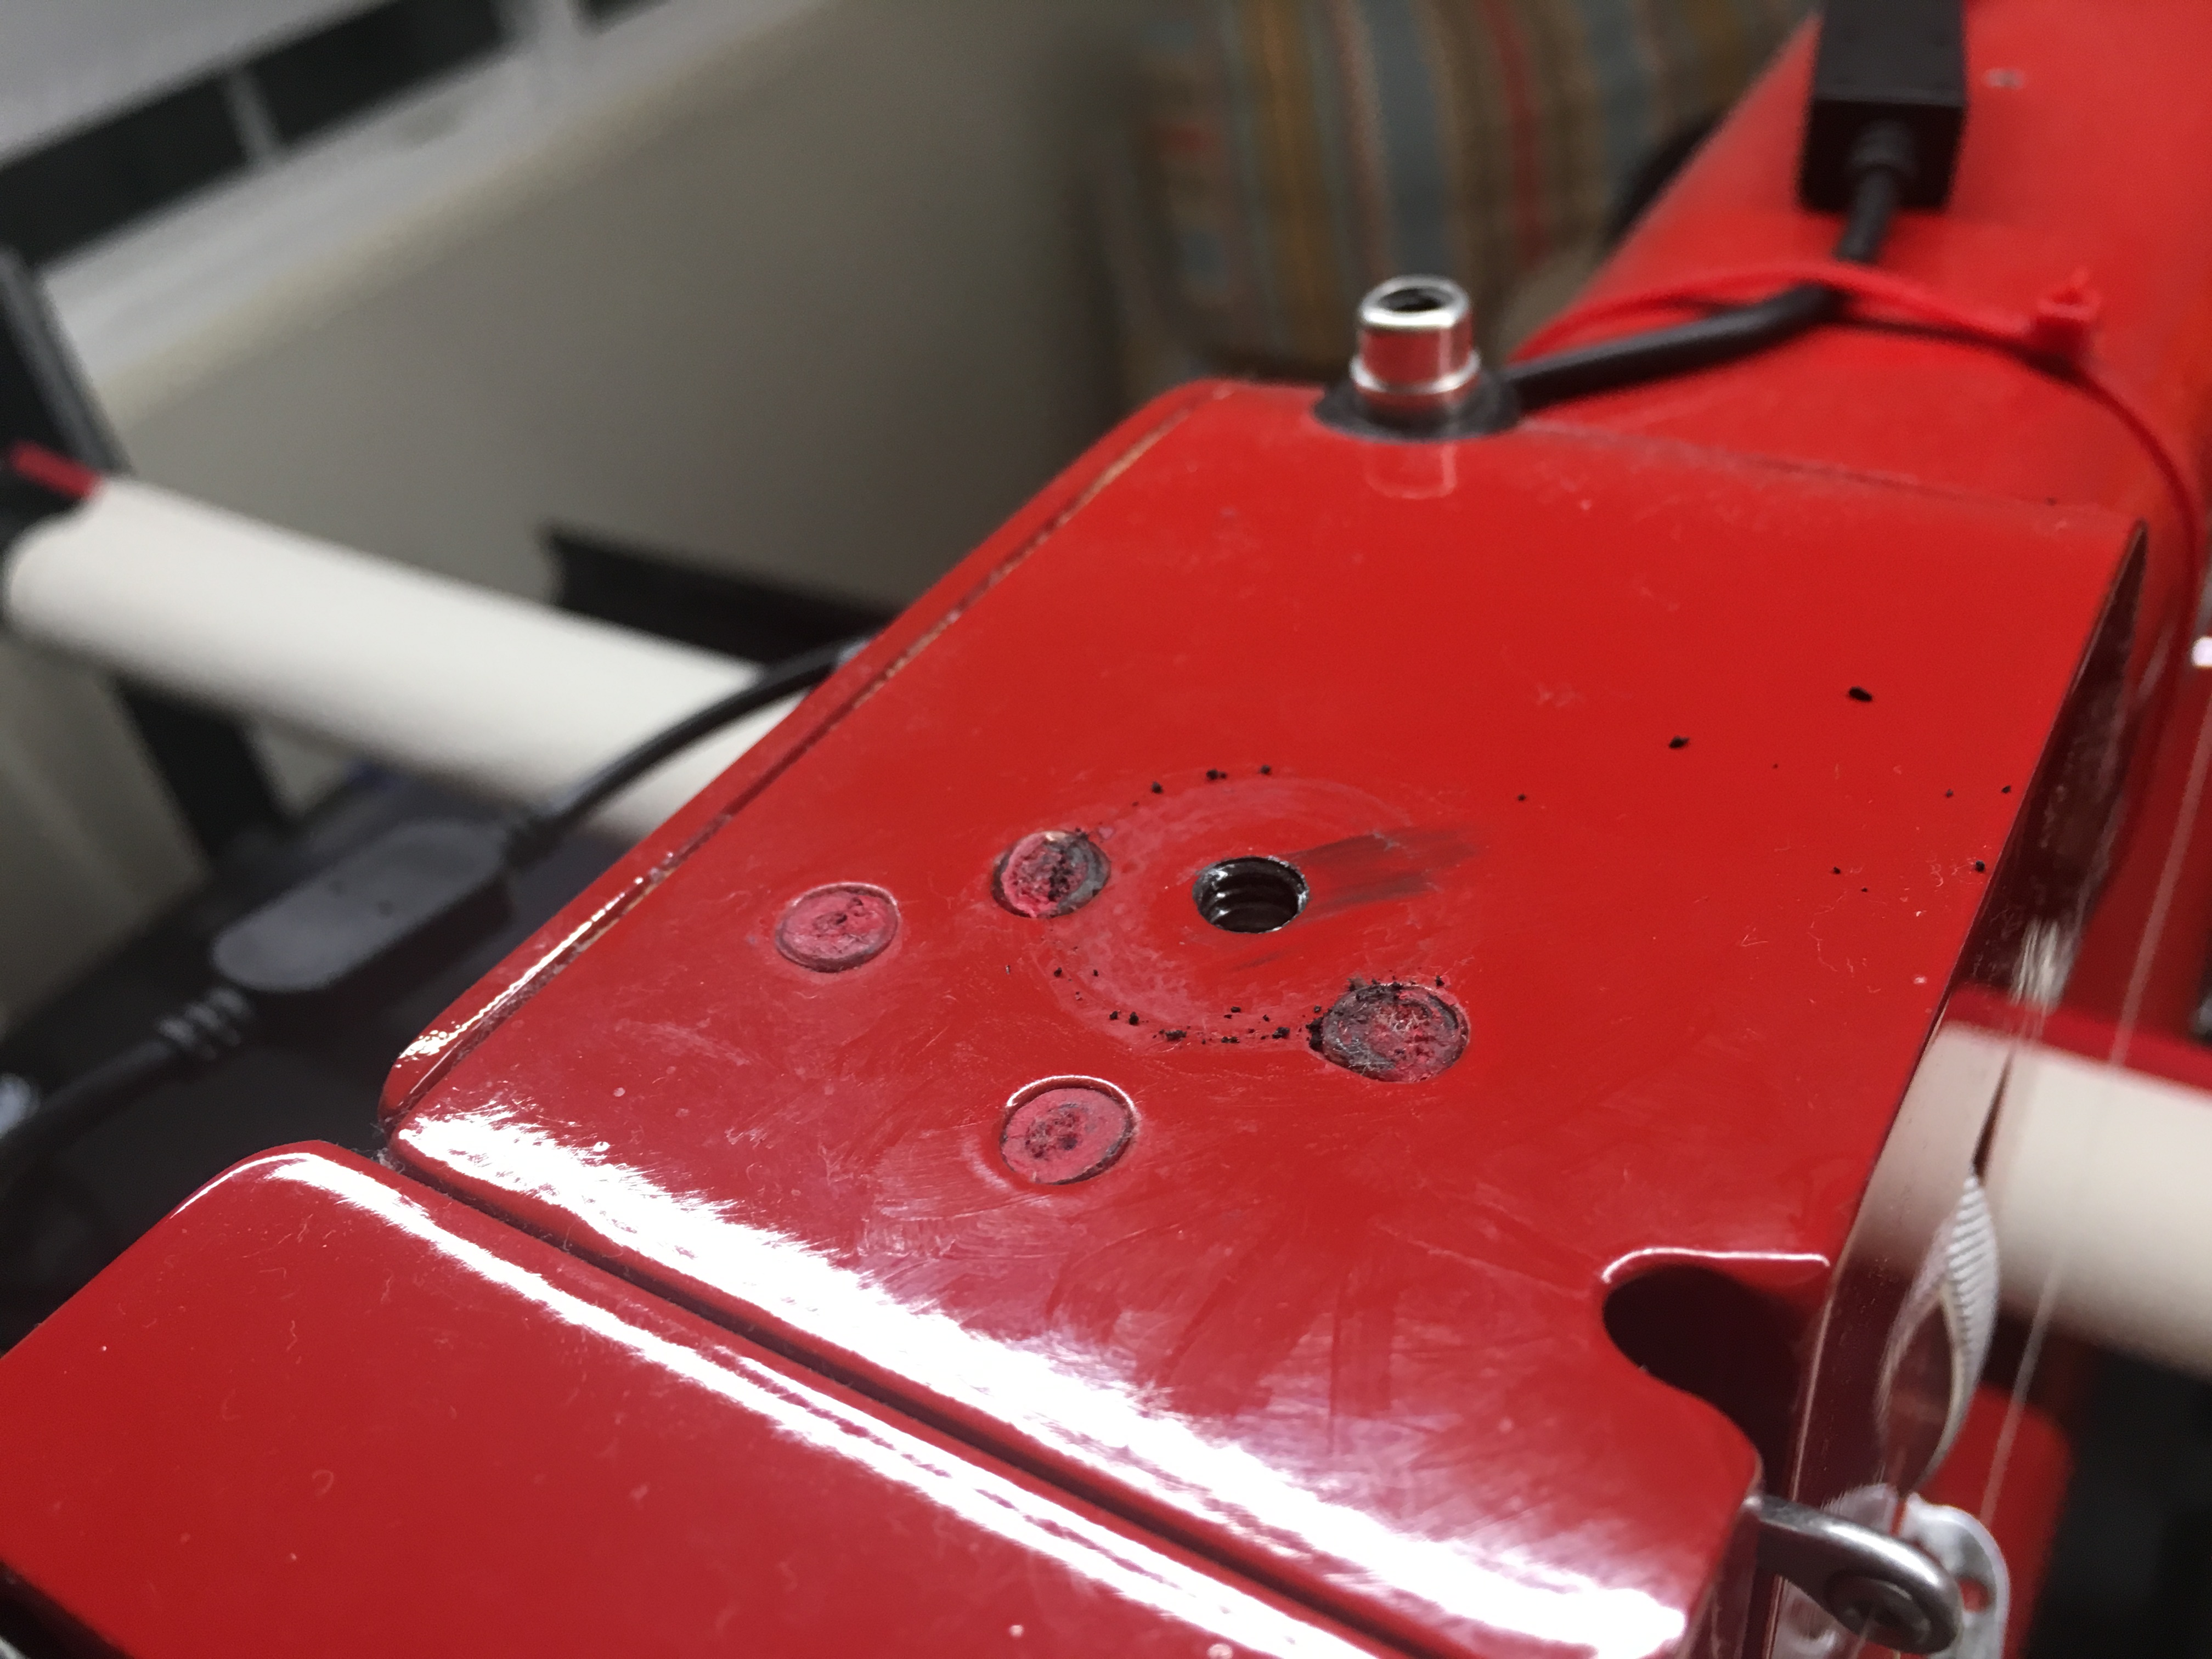
For HandiQuilter Amara users, we have made a bracket for the stitch camera which can be attached underneath the bobbin area of your longarm and puts the camera in alignment with your sewing needle. This camera bracket also works beautifully on the King Quilter longarm from Sewing Machines Plus and many other models of longarms. If your space on the left hand side of your longarm is limited this bracket is a good solution. Contact us if you have questions.